
Maintenance & Repairs
How to Clean Fuel Injectors

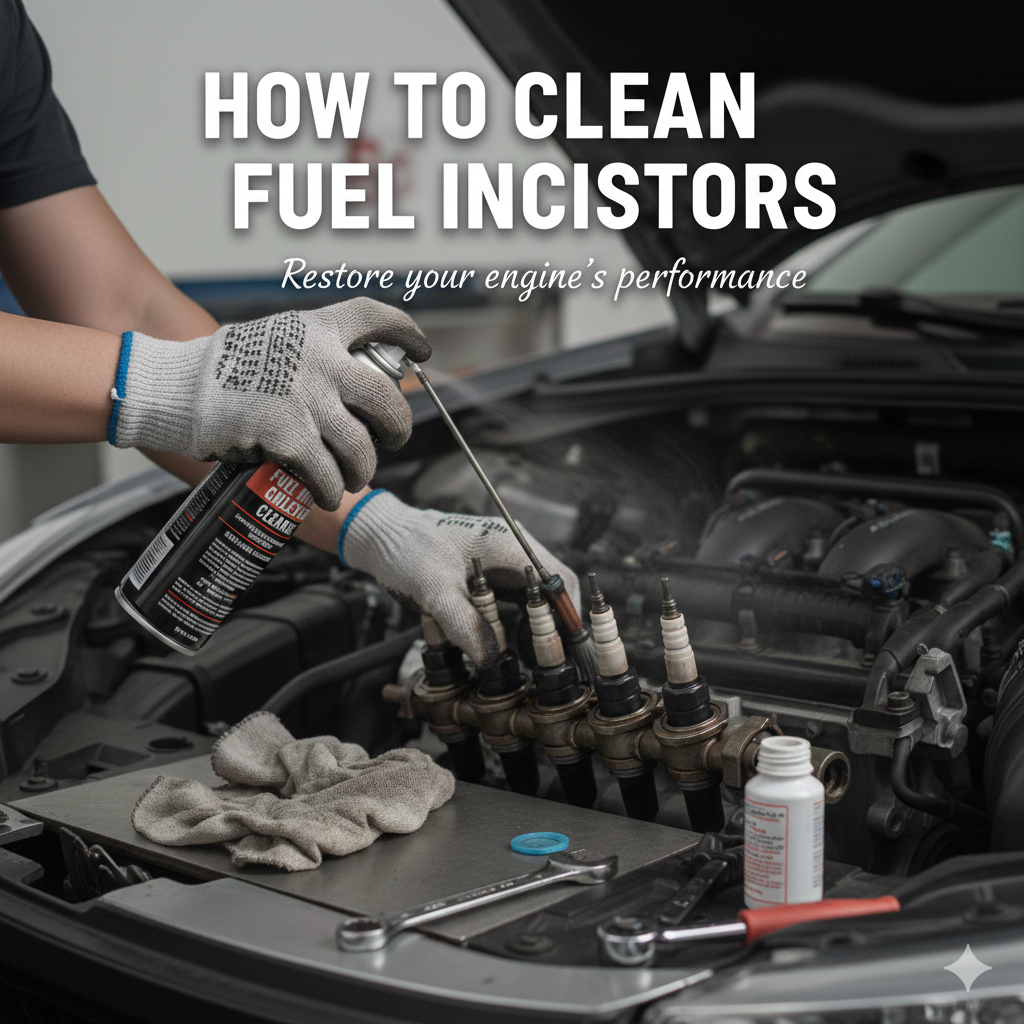
The fuel injection system is essential to the operation of your engine, which is a precision machine. Even the best petrol can eventually leave behind gum, varnish and carbon deposits. Your car’s performance deteriorates when these injectors become clogged, resulting in rough idle, low fuel economy, and slow acceleration.
Everything you need to know about cleaning fuel injectors will be covered in this thorough book, from recognising the signs of a clog to selecting the best cleaning technique for your level of expertise.
Your Fuel Injectors
Prior to delving into the “how-to,” it’s critical to comprehend the true function of a fuel injector. It is an electronically operated valve that atomises pressurised fuel into a thin mist after receiving it from the fuel pump. The ideal explosion is produced when this mist combines with air in the combustion chamber or intake manifold.
Why do they become filthy?
A tiny bit of fuel is left on the injector tips each time you shut off your engine. Heavy chemical compounds are left behind when this fuel evaporates due to the engine’s heat. Eventually, this process, called “heat soak,” forms a hard crust that interferes with the spray pattern. Because the injectors are situated inside the combustion chamber, where they are subjected to intense heat and pressure, modern engines—especially Gasoline Direct Injection (GDI) systems—are significantly more vulnerable to carbon buildup.
Signs of Clogged fuel Injector
How can you tell when a cleaning is necessary? Typically, your car will alert you by displaying one or more of the following “red flags”:
Engine Misfires: The cylinder may miss a combustion cycle if the injector is clogged and does not spray enough fuel.
Rough Idling: Your air-fuel ratio is probably incorrect if your car trembles or the RPMs bounce when it is stopped at a signal.
Reduced Fuel Economy: The fuel burns less effectively when the spray pattern is inadequate. Gas is wasted when your engine’s computer tries to make up for it by injecting extra fuel.
The “Check Engine” Light: Contemporary oecus (Engine Control Units) can identify a misfire or “lean” situation, which frequently results in codes like P0171 or P0300.
Difficulty Starting: The engine may have trouble getting the proper air-fuel combination to ignite during startup if the injectors are leaking or clogged.
Is your car idling rough or losing gas mileage? It might be time to clean those fuel injectors. You don’t need a mechanic to restore that “new car” feel—you just need the right tools.
I highly recommend this Fuel System Cleaner. It’s the easiest way to remove carbon buildup, improve throttle response, and get your engine running back at peak efficiency.
Buy now on Amazon:https://amzn.to/4pyNEO0
Selecting the Best Cleaning Technique
Fuel injectors can be cleaned in three main ways. The severity of the obstruction and your degree of tool comfort will determine the best option.
Method 1: Preventative Maintenance using Fuel Additives
The simplest approach is this one. All you have to do is fill your petrol tank with a concentrated cleaning. Polyetheramine (PEA), a potent detergent that can withstand high temperatures, is frequently found in these cleansers.
Ideal for: Vehicles under 50,000 miles and light deposits.
Advantages: Low cost, requires no tools, and cleans the fuel pump and lines.
Cons: A severely blocked injector with no fuel flow cannot be fixed.
Method 2: Intermediate Do-It-Yourself On-Car Pressurised Cleaning Kits
This calls for the use of a specific cleaner canister that attaches straight to the fuel rail. You turn off the petrol pump and only use the cleaning solvent to power the engine.
Ideal for: Restoring high-mileage automobiles’ performance without removing any parts.
Advantages: Cleaning intake valves and effectively eliminating obstinate carbon.
Cons: Needs a basic understanding of your gasoline system and specialised tools, which cost between $100 and $150.
Method 3: Ultrasonic Cleaning Off-Car (Professional Restoration)
After being taken out of the engine, the injectors are electronically pulsed and put in an ultrasonic bath.
Ideal for: Injectors that have failed a flow-balance test or are totally “frozen.”
Advantages: Enables visual flow testing and returns injectors to “like-new” state.
Cons: Labour-intensive; upon reinstallation, all rubber O-rings and seals must be replaced.
Detailed Instructions for Using a Pressurised Cleaning Kit
The pressurised kit provides the optimum blend of effort and results for the majority of do-it-yourself enthusiasts seeking a discernible performance gain.
Equipment and Supplies Required:
Fuel injector cleaning kit (with a hose and pressure gauge).
Professional-grade fuel system cleaner canister.
Simple hand tools (pliers, wrenches).
Nitrile gloves and impact-resistant eye protection are examples of safety equipment.
Step 1: Hit the Operating Temperature
Let your automobile run until it reaches its typical operating temperature after starting it. This increases the cleaning solvent’s effectiveness by softening the carbon deposits.
Step 2: Release Pressure in the Fuel System
Find the fuse or relay for your fuel pump, which is often located in the engine compartment fuse box. Pull the fuse while the engine is running. After a few seconds, as the engine runs out of fuel in the lines, it will stumble and stall. This is crucial because it prevents high-pressure petrol from spraying you when you disconnect fuel lines.
Step 3: Attach the Cleaning Kit
Find the fuel rail’s Schrader valve. It resembles a tire’s air valve identically. Screw the cleaning kit’s hose onto this valve. You must disconnect the main fuel supply line and “T” into the system using the adapters included in your kit if your car lacks a Schrader valve.
Step 4: If applicable, block the fuel return.
If your vehicle has a fuel return line, it needs to be plugged or clamped shut. If you don’t, the cleaning solution will just return to the petrol tank without passing through the injectors.
Step 5: Begin the Cleaning Procedure
To pressurise the rail, open the cleaning canister’s valve. Adjust the regulator to the fuel pressure recommended by the manufacturer, which is often between 35 and 50 PSI.
Turn on the engine. At this point, it will run only on the solvent.
Until the canister is empty and the engine stalls, let the engine idle. It often takes ten to fifteen minutes.
Step 6: Reassemble and Examine
Switch off the ignition. Reinstall the fuel pump fuse after disconnecting the kit and removing any clamps on the return line. After starting the vehicle, let it a few minutes to idle. Look closely for any indications of leakage in the fuel rail.
Is your car idling rough or losing gas mileage? It might be time to clean those fuel injectors. You don’t need a mechanic to restore that “new car” feel—you just need the right tools.
I highly recommend this Fuel System Cleaner. It’s the easiest way to remove carbon buildup, improve throttle response, and get your engine running back at peak efficiency.
Buy now on Amazon:https://amzn.to/4pyNEO0
Expert Advice
Steer out of “Snake Oil”: Look for “PEA” on the ingredient list when purchasing additives. Although less expensive, solvents like PIBA (Polyisobutylene Amine) are less successful in cleaning the combustion chamber.
Change Your Oil After: Some of the dissolved carbon and solvent may “blow by” the piston rings into the oil if your injectors were really unclean. After a deep injector cleaning, it’s usually a good idea to change the oil.
The Highway Run: After washing, drive your vehicle on the highway for twenty minutes. The loosened carbon particles are expelled through the exhaust thanks to the increased RPMs and prolonged heat.
The Distinction Between a Mist and a Stream
A broad, conical mist is produced by a clean injector. Even if it isn’t “blocked,” a filthy injector could result in a “split” spray or a solid stream of liquid. Fuel doesn’t mix effectively with air when it enters the cylinder as a liquid stream rather than a mist, which causes unburned fuel to depart the exhaust.
It may “wash” the oil from the cylinder walls, causing the engine to wear out more quickly.
Pre-detonation (engine knock) may result from the “hot spots” it produces on the piston head.
Cleaning your injectors guarantees that the gas is in the proper physical condition to explode effectively, not just that the car gets “enough” gas.
Port Injection vs. Gasoline Direct Injection (GDI)
Depending on the kind of injection system your car has, the cleaning procedure can differ greatly. You can better control your expectations for the cleaning results if you know which one you have.
Injection of Port Fuel (PFI)
Fuel is sprayed onto the back of the intake valve by the injector, which is located in the intake manifold of older or more conventional engines.
The Advantage: The intake valves are kept clean because the fuel, which includes detergents, continuously “washes” them.
Ease of Cleaning: Because the solvent spends a lot of time in touch with the soiled surfaces, cleaning these with tank additives is quite simple.
Direct Injection of Gasoline (GDI)
GDI is used in the majority of contemporary vehicles (made after 2010). In this case, the injector is situated inside the combustion chamber.
The problem is that the injector is subject to the entire force of the explosion because it is inside the cylinder. This results in carbon deposits that are far more difficult for basic tank additives to remove.
The “Valve” Issue: Fuel never comes into contact with the intake valves since it is sprayed straight into the cylinder. This indicates that GDI engines frequently have carbon accumulation on the valves that is inaccessible to injector cleaners. In addition to cleaning the injectors, a separate “Intake Valve Cleaner” spray may be required if you have a GDI engine.
Safety and Environmental Aspects
When doing a deep clean, there are environmental considerations to take into account in addition to the inherent danger of working with fuel.
Managing Solvent Waste
Compared to regular petrol, the chemicals used in ‘on-car’ cleaning products are far more aggressive. They frequently have significant levels of methanol, acetone, and xylene.
Storage: Because these chemicals can melt through some types of plastic, never keep leftover solvent in an unlabelled container or a plastic water bottle.
Getting rid of: Don’t dump used gasoline or solvent down the drain. Bring it to a nearby hazardous waste facility or a car parts shop that takes used fluids.
Personal Security: The “Flash Point”
Because petrol has a very low flash point, a single spark can ignite it even in cold weather. Keep a Class B fire extinguisher close at hand whenever you disconnect fuel lines.
Work outside or in a garage with a fan going and the door open.
Touch a grounded metal component of the vehicle before contacting the gasoline rail to avoid static electricity.
Is your car idling rough or losing gas mileage? It might be time to clean those fuel injectors. You don’t need a mechanic to restore that “new car” feel—you just need the right tools.
I highly recommend this Fuel System Cleaner. It’s the easiest way to remove carbon buildup, improve throttle response, and get your engine running back at peak efficiency.
Buy now on Amazon:https://amzn.to/4pyNEO0
FAQ
Is it possible to clean my injectors with seafoam?
A common multipurpose cleanser is seafoam. It is usually regarded as a “light” cleanser, yet it is safe for the petrol tank. A specialised fuel system cleaning with PEA (polyetheramine) is usually more effective for heavy deposits.
Will a “Lean Condition” code be resolved by cleaning my injectors?
Yes, most of the time. A “Lean” code (P0171 or P0174) indicates an excess of air and insufficient fuel. A lean mixture is produced when an injector is clogged because it is not supplying the quantity of fuel that the computer anticipates.
How frequently should I actually clean them?
A premium tank additive every 5,000 to 10,000 miles is sufficient for the majority of drivers. Usually, a professional “on-car” pressurised cleaning is only required every 50,000 to 75,000 miles, or if you start to notice problems with performance.
Can my catalytic converter be harmed by unclean injectors?
Indeed. Unburned raw fuel enters the exhaust system when a misfire is caused by a dirty injector. The catalytic converter overheats and finally melts its internal ceramic structure as a result of this fuel burning inside of it. You may avoid replacing your catalytic converter, which can cost more than $1,000, by cleaning your injectors.
In conclusion, when taking into account the longevity and performance of a modern car, the overall significance of maintaining a clean fuel system cannot be emphasised. Even while modern automobile power plants are engineering marvels, built to function with surgical precision, they are nevertheless largely reliant on the “purity” and consistency of the fuel-air mix.
Making fuel injector cleaning a top priority is more than just a simple task—it’s a vital restoration. Fuel impurities and small carbon deposits eventually build up, upsetting the delicate spray patterns necessary for optimum combustion. Reduced gas mileage, rough idling, and a discernible loss of throttle response result from the engine having to work harder due to this buildup. By removing these obstacles, you are actively restoring the car to the precise specs and maximum efficiency that the engineers intended on the day it came off the assembly line, rather than just resolving a brief technical glitch.
In addition, a clean system protects the remainder of the car. “Lean” burn conditions, which can raise engine temperatures and put unnecessary strain on parts like the catalytic converter and oxygen sensors, are frequently caused by clogged injectors. Therefore, making an investment in fuel system cleanliness is a preventive approach that avoids a cascade of expensive repairs. Maintaining this purity over time guarantees that your vehicle will continue to be dependable, eco-friendly, and as powerful as the manufacturer promised.

When a car stalls while driving, something’s wrong with the fuel pump, electrical, or engine systems. Most of us check the radiator and battery head daily before driving out; however, some other things can make the car jerk as we are driving or stop us on the road.
The truth is that many drivers neglect warning signs in the car. Before a car breaks down or develops mechanical faults, it must have shown you signs, but you ignored them. Many modern cars now have features that can display warning issues on the dashboard, such as the check engine light, oil change, and maintenance light.
Older cars may lack these features. So, it will require regular servicing like oil change, cleaning, or changing spark plugs. They may appear little at first; however, these things can make your car stall when driving.
What It Means When a Car Stalls While Driving
When a vehicle stalls, it shows that there is little or no combustion in the engine. Sometimes, the stalling is irregular but can increase, especially in traffic or on a hill.
Many modern cars have complex systems under the hood, yet they rely on three essentials: fuel, air, and spark. Fuel supplies the engine with energy. Air is vital because it helps the fuel burn properly. The spark ignites everything. This combination is needed for the engine to function well.
In addition, you may notice that the steering wheel feels tough to turn, and pressing the brakes will require more force. If any feature fails, it can affect engine performance.
Even if the car restarts after some minutes, that doesn’t mean you should not check what must have caused that. Although it might be a minor issue, it is like a signal from your car suggesting you attend to them.
Common Causes of Car Stalling While Driving
A vehicle can stall for many reasons. Let’s look at the most common issues.
- Fuel System Problems
This is a frequent cause of a car stalling. An engine needs a continuous fuel supply to function well. Without enough fuel, everything slows down and eventually stops.
If the fuel pump is going bad, the filter gets clogged, or there’s a dip in pressure, that is when there won’t be adequate combustion. Because the fuel is not flowing well, the engine will shut off, or the car will jerk as you are driving.
The car might feel sluggish when trying to speed up, as if it’s moving through mud. When you go faster, there could be a slight jerking or sputtering because the engine can’t keep pace.
Sometimes, pressing the throttle doesn’t get an immediate response; there’s a pause before power kicks in like it usually does. Ignoring these signals only makes things worse with time.
- Battery and Charging Issues
When your car stalls during a drive, don’t ignore the battery and charging system. Starting the engine isn’t the only job of the battery; once on the road, the alternator powers everything. If it fails, your battery drains fast. At first, you may see dim headlights or weak acceleration, and warning lights may pop up on your dashboard.
If you don’t notice this on time, the car will stop. Loose or worn out battery terminals can disrupt power flow, too, causing unexpected stalling. Sometimes, if the alternator is not charging the battery, the car will shut off. But this happens when you turn off the car.
To get to the root of these issues quickly, use a multimeter or diagnostic tool to check if your battery’s low or if there’s an issue with the alternator.
- Faulty Sensors and Engine Management Systems
Today’s cars depend a lot on sensors and the engine control unit (ECU) for smooth operation. If any sensor is getting weak or fails eventually, it can confuse the system; thereby cause the car to stall while you’re driving.
Take, for instance, a malfunctioning mass airflow sensor (MAF); it can give an incorrect air reading, which may warrant either too much or too little fuel to reach the engine.
When a broken crankshaft or camshaft position sensor affects the timing, it can stop the car. Even small issue like a faulty throttle position sensor can cause problems.
Sometimes, the check engine light alerts you, but not always. When stalling occurs and you suspect sensors are at fault, use a diagnostic scan to identify the exact problem.
- Ignition System Failures
The ignition system is what starts your engine and keeps it going. Basically, it sparks at the right time to light up the air-fuel mix in the engine’s cylinders. That tiny spark gives your car the power it needs to move.
When those spark plugs are weak, they prevent the car from starting. And if by chance it starts, the car can stop on the road. Parts such as worn-out spark plugs, a malfunctioning ignition coil, a faulty crankshaft position sensor, or damaged wiring can disrupt this spark.
Spark plugs can fail because of:
- Normal wear and tear
- Carbon buildup (carbon fouling)
- Oil contamination (oil fouling)
- Overheating
- Incorrect spark plug gap
- Using the wrong type of spark plug
- Faulty ignition coil
- Poor fuel quality
- Air-fuel mixture imbalance
- Engine overheating
- Loose or damaged wiring
- Detonation or pre-ignition
- Coolant leaks into the combustion chamber
- Airflow Problems and Vacuum Leaks
Engines need a balanced mix of air and fuel. When there’s too much air or not enough fuel, you get a lean mixture. This makes the engine struggle to keep up its power. You may also notice a small hesitation or an uneven idle before things get worse.
After a while, little issues like a dirty throttle body or a tiny vacuum leak can affect this balance. When that happens, your car can stall when you slow down or stop at traffic lights. At first, it’s subtle, but ignoring it can cause further problems in the engine area.
Warning Signs Before a Car Shuts Of
When you hear an unusual sound or see signs on your dashboard when driving, park and check. Cars don’t just stop; it shows warning signs like:
- Engine sputtering
- Loss of power when accelerating
- A dashboard warning light appears briefly.
- Rough idle or shaking
- Difficulty maintaining speed
What Happens the Moment Your Engine Shuts Off While Driving
- Once the engine stops, the car acts in another way. You start to see it:
- Power steering assistance disappears or weakens.
- The brake pedal feels harder.
- Acceleration becomes impossible.
Can a Car Start Again After Stalling While Driving?
It can happen, and sometimes you barely notice anything wrong. If the problem was temporary, like a short fuel interruption or a minor sensor issue, the car may start again when you turn the key.
If it refuses to start, then it could be a more serious mechanical or electrical problem. Even if it starts again after some minutes, ignoring this can lead to bigger repairs later.
Also, some cars show patterns in how they behave. The car keeps stalling, but it only gets going once the engine cools down.
Issues like an overheating fuel pump or a faulty sensor could be the cause. In simple terms, whether the vehicle starts immediately or not, frequent stalls clearly indicate something’s wrong.
Reasons Your Car Won’t Start After It Shuts Off
If your car stalls and then refuses to restart, the issue is more severe.
Common reasons include:
- Dead or drained battery
- Failed fuel pump
- Faulty ignition switch
- Engine overheating
- Blown fuse or relay
Sometimes, if there’s not enough oil pressure or it gets too hot, the engine could seize. This means it just can’t turn anymore. While that’s not common, when it does occur, it’s costly to fix.
How Mechanics Diagnose Car Starting Problems
A good technician follows a process.
They typically:
- Scan for trouble codes.
- Check fuel pressure.
- Test the charging system.
- Inspect sensors and wiring.
- Look for vacuum leaks or air intake issues.
These days, cars have systems that can detect faults. So, if a car stalls now and then, it may leave electronic signs. But here’s the thing: not every issue makes a warning light flash.
Related Post:How to Check a Car Alternator
What To Do Immediately When Your Car Stalls on the Road
As a driver, you should have some basic mechanical skills. It’s not everything that requires the service of a mechanic. Sometimes, a weak battery cap or a bad fuel pump can prevent the car from moving normally.
Ordinarily, there are signs. However, if your car stalls on the way, there are a few things to do.
- Try to restart the car.
- Turn on hazard lights.
- Shift to neutral
- Park in a safe area.
If the first attempt didn’t work, restart again.
Don’t slam the brakes. If the engine won’t start again, don’t try to crank it over and over; it can drain the battery and cause more problems.
How to Prevent Car Stalling
You can’t stop every mechanical problem. But the good news is that routine maintenance can lower the chances of your car unexpectedly breaking down. Here are some things you can do:
Change fuel filters as recommended
A blocked fuel filter can affect the fuel supply to the engine. If the fuel filter is bad, you’ll notice these signs:
- Engine sputtering
- Difficulty starting the car
- Poor acceleration
- Engine stalling
- Rough idling
- Reduced fuel efficiency
- Loss of power under load
- Engine misfires
- Check engine light coming on
- Hard starting or long cranking time.
Look for Battery Terminal Corrosion
Corrosion on battery terminals can lead to major issues like the car stalling. With time, a white or bluish substance may gather around the terminals and disrupt the car’s electrical flow. If the connection is weak or unstable, it will affect the car performance.
Clean Engine Sensors
Modern cars depend a lot on sensors for the engine to work right. Key ones, like the mass airflow and oxygen sensors, manage how much air mixes with fuel. With time, dust and debris may block them or send incorrect signals to the engine.
This can result in bad performance, rough idling, or even stalls. So, cleaning these sensors regularly helps them to function correctly.
See how to clean engine sensors.
- Turn off the engine and disconnect the battery.
- Locate the sensor (e.g., MAF or oxygen sensor).
- Carefully disconnect the sensor wiring connector with a Torx or Phillips screwdriver
- Remove the sensor with a sensor socket or a deep-well socket
- Spray the sensor with a dedicated sensor cleaner.
- Do not touch or scrub delicate parts.
- Allow the sensor to air dry completely.
- Reinstall the sensor properly.
- Reconnect the wiring connector.
- Reconnect the battery and start the car.
Buy Quality Fuel.
Using poor-quality or contaminated fuel can affect the engine. It’s important to buy from reliable stations. If possible, get a fuel injector. Use popular brands like Liqui Moly, Sea Form, and Lucas Oil.
Why Modern Cars Stall Less Often Than Older Vehicles
Back then, cars ran mainly on mechanical systems. They used belts, carburetors, and basic switches for tasks like fuel delivery, timing, and ignition. If they don’t set right, the car would stop without any warning sign.
Modern vehicles are quite different. They use electronic fuel injection, computer-controlled engines (Electronic Control Module (ECM), and several sensors that work simultaneously, such as regulating fuel, air, and spark automatically.
However, when a modern car stalls, if you don’t use an OBD scanner, it may be difficult to know the exact cause. Unlike older cars, they show signs of engine misfires or fuel smells. So, you will need a professional diagnosis in these situations.
Final Thoughts
A car doesn’t stall without a reason. Something can trigger that. It could be a faulty fuel pump, electrical issues, air intake, or mechanical problems. The challenge sometimes is that you may not know the exact problem. In this case, a scanner can be used to detect the particular problem.
In some situations, when a car stalls while driving, a restart can work. This happens when there is a glitch.
If restarting the car works and everything appears fine, turn it off to see if it will start again. To prevent this from happening, call your mechanic to check the car.

Toyota Financial Services, Ford Credit, and Honda Financial Services, allow refinancing and gap insurance. While filling out a form, the dealership may ask if you want Guaranteed Auto Protection (GAP coverage). Don’t be quick to say yes or no if you have no idea what they are talking about. Find out how much gap insurance costs and whether you even need it.
Most buyers at this point hurriedly tick the box without knowing what they just signed up for. Once you agree to the terms and conditions of the coverage, you must keep to the agreement. And some terms you may come across is Guaranteed Auto Protection or Coverage.
What Is Guaranteed Auto Protection (Gap Coverage)
Before we get to the cost, let’s clarify one basic question: What is gap coverage, and why does it keep appearing whenever someone talks about car financing?
In essence, gap insurance covers you for the shortfall between what your standard car insurance pays out after a total loss and what you still need to pay on your loan or lease. It is applied only when the car is declared a total loss or stolen and not found.
Here’s where it gets interesting. Cars apparently don’t retain value the way people think. Once you drive a new car off the lot, its resale value begins to drop. Your loan, however, doesn’t reduce.
You’re still paying interest on the full amount you borrowed. So it’s quite easy to owe more on your car than it is actually worth just a month or two after you buy it. That’s not poor financial planning, but how depreciation works.
“Gap insurance covers the difference between your car’s value and the amount you still owe on your loan. When drivers hear stories of people paying for a car that has already been totaled, they start asking, “How much does gap insurance cost?”
When gap coverage is included in your car insurance policy, most drivers are hit with a fee of $20 to $40 per year at most, which converts to about $2 to $5 per month. It is one of the cheapest add-ons that you can attach to a car insurance policy.
Buying gap insurance from a dealer can cost more. They charge a one-time fee ($400-$800+) added to your loan, rather than a small monthly payment. So, you are paying a premium price for the exact same coverage.
Gap insurance usually costs between $2 and $14 per month, or $24 to $168 annually. Rates depend on your vehicle’s value, loan amount, and state.
How Much Is Gap Insurance per Month with Major Insurers
Gap coverage is calculated differently by insurers. One company might refer to it as “gap insurance,” while another uses the term “loan/lease payoff coverage.” They have the same purpose, but the amount and definition of coverage are different.
Take, for example, Geico, which provides gap coverage in some states and not as part of a comprehensive policy. Progressive has a similar product called loan/lease payoff coverage, but with important distinctions: it rarely covers the entire amount; often covering only the gap up to 25% of the car’s actual cash value. (research yours for the exact percentage).
These coverage thresholds can make a huge difference in your payout when you make a claim.
Your gap insurance premium is calculated with these considerations in mind:
- Vehicle Value: Higher-end vehicles have a greater potential “gap” between their value and loan balance, driving up costs slightly.
- Loan Terms and Amount: The more you financed the car’s cost or the longer your repayment term, the greater the chance you’ll owe more than the car’s worth and the higher your cost.
- Location: Residing in high accident or theft areas may raise your premium.
- Driving History: Although gap insurance is associated with your loan, the car insurers may consider your driving history when determining how much your overall policy will cost. A clean record keeps costs down; a claims history can increase them.
Gap Insurance Cost Through a Dealership vs. an Insurance Company
It’s one of the largest areas where drivers overpay and don’t even know it. You’re already concentrating on interest rates, monthly payments, and the paperwork, so when the dealership presents gap protection, it seems like just another box to check before you drive off in your new car.
Gap insurance is typically offered at dealerships as a one-time fee ($400–$800), which is then added to your auto loan, so you end up paying interest on it for the duration of the loan. This brings the accessory rate much higher than the sticker price.
Or you can buy gap insurance from your car insurance provider for a small additional premium. You get the same basic coverage, but you don’t pay the interest.
The difference in prices can pile up. “It’s cheaper to pay a couple of dollars a month than to pay a few hundred all at once.”
Why Gap Insurance Exists Primarily on New Cars
Most cars lose about 15 to 20% of their value within the first year, sometimes even more, depending on the make and model. That means that a vehicle you paid $30,000 for could realistically be only worth $24,000 or $25,000 by the time you’ve made just under a year of payments.
Nothing is wrong with the car. The car value is only depreciating, that’s all.
When you buy a car using financing, you are repaying the entire cost including the interest. At the initial stage, most of your payment is going toward interest instead of principal. So your vehicle is depreciating fast, but your loan balance is decreasing slowly.
New cars depreciate quickly and often cause a major gap between the value of the car and the loan balance for a long time. Used cars, on the other hand, have already taken that steep initial depreciation hit, so the loan-to-value gap is much smaller.
Do I Need Gap Insurance?
You likely need gap insurance if:
- You financed most of the car.
- Your loan term is longer than 60 months.
- You rolled old debt into a new car loan.
- You made a small down payment.
- You may not need it if:
- You paid cash.
- Your loan balance is already lower than the car’s value.
- You made a large down payment.
So the answer to “do I need gap insurance depends on several factors like the above.
How State Laws Affect Gap Insurance Cost
Gap insurance is not mandatory; some leasing companies and lenders may require you to add this coverage to your finance contract if you are not able to show proof of insurability.
Rates for insurance also vary by region. Those driving in areas that see a lot of claims often pay more, as total-loss claims are more frequent.
So your monthly cost in Texas or California, for instance, could vary even if you had the same car model.
What Gap Insurance Does Not Cover
Gap coverage is extremely particular. It simply covers the difference between the amount you owe on your loan and the actual value of your car in the event of a total loss.
It does not cover:
- Engine failure
- Repairs
- Missed loan payments
- Late fees
- New vehicle replacement
Gap Insurance vs. Loan or Lease Payoff Coverage: Are They the Same?
A few insurers, like Progressive, don’t call it “gap insurance.” They refer to it as loan or lease payoff coverage. It sounds different, but it essentially does the same thing: If your vehicle is destroyed or stolen, it pays the gap.
There is a limit, though. It’s usually about 25 per cent over what the car is worth. That’s fine for most people, but if you owe way more than your car is worth, it won’t cover even half your liability. It’s not exactly the same as gap insurance, but it is comparable.
For instance, if your loan was high and your down payment was low, you could still owe a balance even with this coverage.
When Gap Insurance Stops Being Useful
Gap insurance is not forever.
There’s no longer a gap to insure once your loan balance is less than the market value of your car. Gap insurance is only relevant while your vehicle loan balance is less than the market value of the car. It’s simple to get gap insurance when you buy a car, but many drivers fail to cancel it afterwards.
Months or years later, they don’t know they are still paying for the coverage they no longer need.
Call your insurer to end the monthly fee. It’s a little bit of savings, but with time, it all adds up. And it’s just nice to know that you aren’t paying for something you don’t need to. Gap insurance only provides value during the first few years of a loan or lease; beyond that, it’s extra, and it’s safe to cancel it.
Related Post:Dashboard Indicator Lights Meanings Explained
Factors That Change Gap Insurance Cost
Insurers look at risk and loan structure.
Key factors include:
- Loan-to-value ratio
- Vehicle depreciation rate
- Loan length in months
- Whether the car is leased or financed.
Luxury vehicles and fast-depreciating cars often come with slightly higher premiums.
Why Some People Think Gap Insurance Is a Scam
There are many drivers who will tell you gap insurance is a waste of money. For instance people that:
- Never had a total loss
- Paid off their loan early
- Or had enough equity to start with.
For example:
Car value: $20,000
Loan balance: $25,000
Accident total loss payout: $20,000
If you don’t have gap insurance coverage, you’ll owe $5,000 out of pocket.
The policy covers that gap, and then pays off the loan.
Should You Buy Gap Insurance From the Dealer or Your Insurance Company?
Dealers get commission on the add-ons. Gap coverage is priced by the insurance company as a policy add-on.
So dealership gap insurance is usually several times more expensive for comparable coverage. This is one of the simplest methods by which buyers overpay when financing a car.
When you’re shopping around, always check your insurer first.
How Gap Insurance Works With Used Cars
Most people think gap insurance is for a new car and not a used one, and this is not true. When you have a new car, depreciation hits the hardest right in the first couple of years, so gap coverage is typically most beneficial during that early ownership window.
With a used car, a large part of that value drop has already taken place by the time you buy it. This means that the amount of the loan and the market value of the car are closer in value, so the “gap” is smaller to begin with.
However, there are scenarios where it is worth it to get gap coverage on a used car. Even with used vehicles, you can still owe more than its worth if you financed close to the full price, took a long loan term, or rolled over negative equity from a previous car.
Gap coverage is the one type of insurance that can prevent you from owing money for a vehicle you no longer own.
The timing, however, is what’s different. Used cars reduce the gap quickly as you pay and the value of the car holds firm. So while gap insurance will still help you, you may only need it for a shorter period compared to someone who just drove a brand-new car off the lot.
How Long Should You Keep Gap Insurance?
Most financial advisors suggest that you keep gap insurance until:
- Your loan balance drops below market value.
- Or you refinance to shorter terms.
And that’s because most drivers hit this between the 18- and 36-month mark of their loan term. For the most part, it is safe to remove them after that.
Average Gap Insurance Cost Compared to Other Car Expenses
Typical costs are:
Expense Monthly Cost
- Fuel: $120–$250
- Insurance $80–$180
- Car payment: $300–$600
- Gap insurance: $2–$14.
Final Thoughts: Is Gap Insurance Worth the Cost?
Car insurance is a minor add-on, but it’s essential since it covers the difference between loan payments and the depreciation of the car. “Once your car is totaled, you are exposed to huge financial risk since the value of the car is depreciating faster than you’re paying off the loan.
GAP insurance is an asset if you have a big loan, lease your car, or own one that depreciates rapidly. But if you bought it outright, or you owe less than what the car is worth, you don’t need it; that will be an unnecessary expenditure.
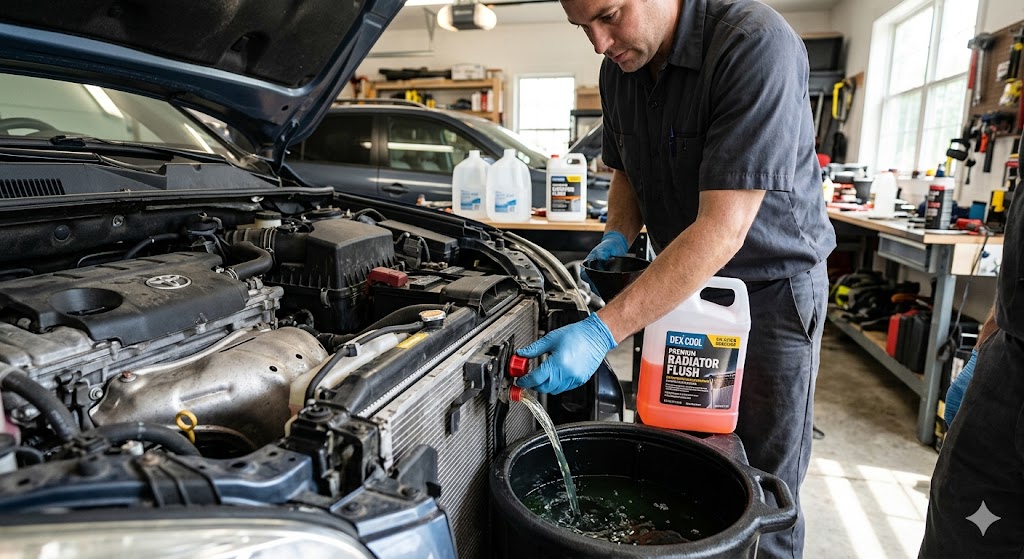
Flush the Radiator: Did you know that you can flush your car radiator by yourself? This may sound like a big deal, but if you have the correct tools, all these can be done in less than 45 minutes. But the question for those that want to follow this DIY method is what are the steps on how to flush a radiator.
Whether you drive a Ford, a Chevy, or something else, the procedure is almost the same. The only difference is the type of coolant, the location of the drain plug, and the volume of fluid your radiator can handle.
Related Post:How to Reset Check Engine Light: A Certified Mechanic’s Step-by-Step Guide
Your radiator is a vital component of the cooling system that stops your engine from overheating every time you drive. As the engine runs, it produces a tremendous amount of heat.
Coolant passes through the engine, where it picks up heat, then goes to the radiator to shed that heat into the air.
Without it, your engine would overheat in a matter of seconds. But the coolant inside that system doesn’t stay clean; it begins to gather rust, dirt, and tiny metal particles.
The rust inhibitors in the coolant also degrade with time. At that point, the coolants will no longer function as they should.
When the flow is restricted, heat cannot discharge effectively, and it will make the engine run hotter than normal. You may not notice it immediately, but the engine parts are under stress.
Flushing the radiator replaces that contaminated fluid and removes some of the debris from your system.
New coolant enables correct circulation of the coolant, heat transfer, and protect the internal components from corrosion and wear.
Skipping this maintenance can cause much more expensive problems than a simple flush, like a failing water pump, a clogged radiator, or even a blown head gasket.
These problems rarely occur; they take time to develop as you continue to run on dirty coolant. If you don’t flush it, those contaminants can clog up tiny paths inside the engine and radiator.
This leads to:
- Poor heat transfer
- Overheating
- Water pump damage
- Weak heater in cold weather.
A coolant flush clears that accumulation and removes old fluid with new coolant, bringing flow and temperature regulation back to normal.
How Often Should You Flush Engine Coolant?
When it’s time to flush your engine coolant, how often do you do this? This depends on factors such as the type of coolant your car uses, the way you drive, and your vehicle manufacturer’s recommendations.
- Coolant Type Makes a Big Difference
Not all coolants are equal. Traditional green coolant is actually the one older vehicles use and needs to be flushed regularly, usually every 2 years or 30,000 miles.
Many current model cars, including Ford and Chevy, now recommend the use of extended-life coolants such as OAT or HOAT coolants.
These last longer, and you can get 100,000 miles or maybe 5 years out of them before you perform a complete flush. But this does not equal “maintenance-free.”
Due to heat cycles, contamination, and normal wear in the system, the coolant may also deteriorate with age, even if it’s still okay.
- How you drive
You may need to flush the radiator earlier if you:
- Live in a hot climate
- Regularly on heavy traffic
- Always towing heavy loads or carrying extra weight.
These things cause your cooling system to run hotter and faster which accelerates coolant breakdown and the possibility of internal rusting.
- Check Your Manufacturer’s Maintenance Schedule
The most accurate information will come from your vehicle’s owner’s manual or the official service schedule. Manufacturers’ engines and cooling systems are tested under regulated environments.
Keeping the manufacturer’s interval will keep the following:
- Your engine is running efficiently
- Your warranty (if still active)
- And long-term workability.
Skipping it isn’t likely to cause immediate issues with your vehicle, but it can reduce the lifespan of several parts, such as the radiator, water pump, and heater core.
Practical Tips
In most cases, engine coolant should be flushed every 30,000 to 50,000 miles or every 2 to 5 years depending on driving conditions and the type of coolant used.
Signs It’s Time to Flush Your Radiator
Disclaimer: Always check your owner’s manual to know what is the exact recommended service interval, as it may vary from car to car.
Look Out For:
- Discolored – brown or rusty coloured, coolant in the radiator or coolant tank.
- Your Engine is running hotter than usual while idling or in traffic
- A sweet smell coming from the engine bay
- Have some small leaks.
Tools You’ll Need
Get all the necessary tools before you start so you don’t have to stop in the middle of the job. You’ll need:
- New coolant
- Distilled water
- Drain pan
- Funnel
- Gloves and safety glasses
- Wrench or pliers (for drain valve)
- Optional, but nice to have:
- Radiator flush cleaner
- Garden hose for deep flushing.
Step-by-Step: How to Flush a Car Radiator
Flushing a radiator is not difficult, but you must have some knowledge. If you follow the steps correctly, you can flush your cooling system.
Step 1: The Engine Must Be Cool
Make sure the engine is cool before you do anything. The cooling system is under pressure when the engine is running. Hot coolant expands, increase pressure within the radiator and hoses.
The pressure can cause boiling coolant to be forced out in a burst if you remove the radiator cap before the system has cooled down, which can lead to severe burns.
So, allow the car to sit for 2 to 3 hours after driving. You should always prioritize safety over speed.
Step 2: Find the Radiator Drain Plug
There is a drain valve or plug at the bottom of the radiator on most vehicles. In Ford trucks and Chevy sedans, it’s toward the passenger side, though it differs by model and year.
If in doubt, consult your owner’s manual, or check under the front bumper. Before you lose the plug, put a drain pan right under it.
Gently lose the plug and allow the coolant to drain completely. As the fluid drains, take a moment to look at it. If the fluid looks dark, rusty, it is a sign that your radiator needs some flushing.
Step 3: Flush the Radiator with Water
Draining the radiator removes most of the old coolant, but it doesn’t clean the entire system. Replace the drain plug. Then add distilled water to the radiator, not tap water.
Distilled water has no minerals that could deposit inside the system. Once filled, start the engine and let it run for a few minutes.
Turn up the heater to its hottest knob next to it while the engine is running. So, what I do is allow the water to run through the heater core, which is a little radiator in the dashboard that cuts out a lot of basic guides.
If you skip this step, old coolant can get trapped in there and later mix with your new coolant.
After a few minutes, turn the engine off and allow it to cool again. Then release the drain plug to discharge the water. You may find the water way too discolored; that’s normal during the first rinse.
Repeat this until the water is clean. This ensures that the old coolant and debris are flushed from the system.
Step 4: Add a Radiator Flush Cleaner (Optional but Wise)
If the drained coolant looks particularly unpleasant, use a radiator flush cleaner. They remove rust, scale, and sludge that water alone can’t get rid of.
To use one, pour the appropriate amount of cleaner into the radiator, then add water to the system. Allow your engine run for 10 to 15 minutes, or follow the instructions on the cleaner’s label.
Then turn off the engine, let it cool, and drain the system again. You’ll see dark water out at this point, which means it’s doing a good job.
Step 5: Refill with Your Coolant Solution
Once the system is flushed and drained, you need to fill it with new coolant. Most vehicles run on about a 50/50 mix of coolant and distilled water.
Some coolant brands are pre-mixed and ready to pour into the radiator, and others are in concentrate form and need to be diluted.
Always check your owner’s manual for the following:
- The correct type of coolant
- The proper mixing ratio
- TSC-Specific Vehicle System Capacity.
Modern engines require a special coolant formulation, and the use of incompatible coolants, such as “traditional” green coolant with orange or yellow coolant that can form sludge within the system.
Slowly pour the coolant into the radiator through a funnel to prevent spilling. Fill to the specified level and top off the coolant reservoir.
Step 6: Bleed Air from the Cooling System
After filling, air pockets could remain in the cooling system. These pockets of air can prevent the coolant from circulating properly, leading to overheating, despite a full radiator.
Run the engine with the radiator cap off to get rid of this trapped air. Let the engine idle and observe the coolant level in the radiator.
When the thermostat opens as the engine warms up, coolant starts flowing, and you will notice bubbles on the surface.
This bubbling is normal: air is vented out of the system.
While it is going down, add more coolant to keep it full.
When the bubbling slows and the level levels out, you can put the radiator cap back on with confidence.
There is also a separate bleed screw on the thermostat housing or coolant lines in some vehicles as well. If your car has one, briefly opening it while the engine heats up can accelerate the escape of trapped air.
Check After the Flush
After flushing and refilling, go for a short drive, then keep an eye on the temperature gauge. The engine should warm up to operating temperature and remain constant without cycling.
Check the coolant level in the radiator and reservoir. It’s common for the level to drop a little bit after the first drive, as air remaining in the system escapes.
Filling it up at this point makes sure that your cooling system is completely full and is working as it should.
How Much Coolant Does Your Car Actually Use?
Typical capacities:
- Small cars: 5-7 liters
- Trucks and SUVs: 10-15 liters
- A Ford F-150, for example, uses more coolant than a Chevy Malibu.
Always check the exact capacity to avoid underfilling.
Mistakes People Make When Flushing a Radiator
Opening the radiator when it’s hot: This is bad because it can cause severe injuries.
Using tap water in place of distilled water: Tap water has minerals that will cause scale deposits inside the system.
Mixing incompatible coolant types
Green, orange, and pink coolants are not cross-compatible. Mixing them creates a gel-like sludge that can block passages.
How Much Does a Radiator Flush Cost?
Professional coolant flush is between:
$80 and $200, depending on vehicle type and service fee.
Dealerships for Ford or Chevy vehicles may be higher because they use manufacturer-approved fluids.
Flushing the coolant yourself can save money, but you have to dispose the old coolant carefully, because it’s toxic.
Signs Your Cooling System Needs Immediate Flushing
Your car usually provides warnings before severe overheating starts.
Watch for:
- Temperature gauge climbing above normal
- Coolant that is brown or muddy
- Sweet smell coming from under the hood
- Heater blowing cold air in the winter.
Neglecting these signs can result in costly damage, such as blown head gaskets or cracked engine blocks.
Differences Between Flushing and Draining Coolant
Draining and flushing are not the same. Draining only drains the fluid out of the interior of the radiator. Flushing flushes the entire system, comprising the following:
- Engine block
- Heater core
- Hoses.
If your coolant is slightly dirty, a drain and refill may be enough. But if there’s visible contamination, a full flush is the better choice.
Special Considerations for Ford and Chevy Vehicles
Although the flushing procedure could be the same in every brand, the formulas for the coolants in Ford and Chevy models are different.
Ford uses:
- Yellow or orange extended-life coolant
Chevy often uses:
- Dex-Cool coolant, has a longer life but sensitive to contamination by air
When these fluids are mixed with a standard coolant, they react to form sludge.
So every time you flush the engine coolant on these vehicles, always put in the right coolant.
Can You Drive Without Flushing Coolant?
You can, but not advisable. The used coolant turns acidic and corrodes metal parts. That corrosion also moves through the radiator, water pump, and engine passages.
Environmental and Safety Tips
Never:
- Pour coolant down the drains.
- Dump it on the ground.
Most auto shops and parts stores accept used coolant for safe disposal.
Final Thoughts: Is Flushing Your Radiator Worth It?
Regardless of whether you drive a compact Chevy Malibu or a heavy-duty Ford F-series pickup, as soon as you turn the ignition, the components are powered and the pump starts circulating right away.
Flushing the radiator keeps:
- Temperatures stable and it
- Reduces internal corrosion.
-
Maintenance & Repairs1 year ago
Car Undertray Repair Cost
-
Car Tips & Advice1 year ago
Tyre puncture Repair Cost
-
Car Tips & Advice12 months ago
Is Automobile Insurance Tax Deductible?
-

 Maintenance & Repairs12 months ago
Portable Air Conditioner for Car
-

 Maintenance & Repairs11 months ago
How much does it Cost to Paint a Car?
-

 Car Tips & Advice11 months ago
Exhaust Pipe Repair Kit
-

 Car Tips & Advice11 months ago
AC Compressor Replacement Cost
-

 Maintenance & Repairs11 months ago
How to repair a scratched car wheel