Maintenance & Repairs
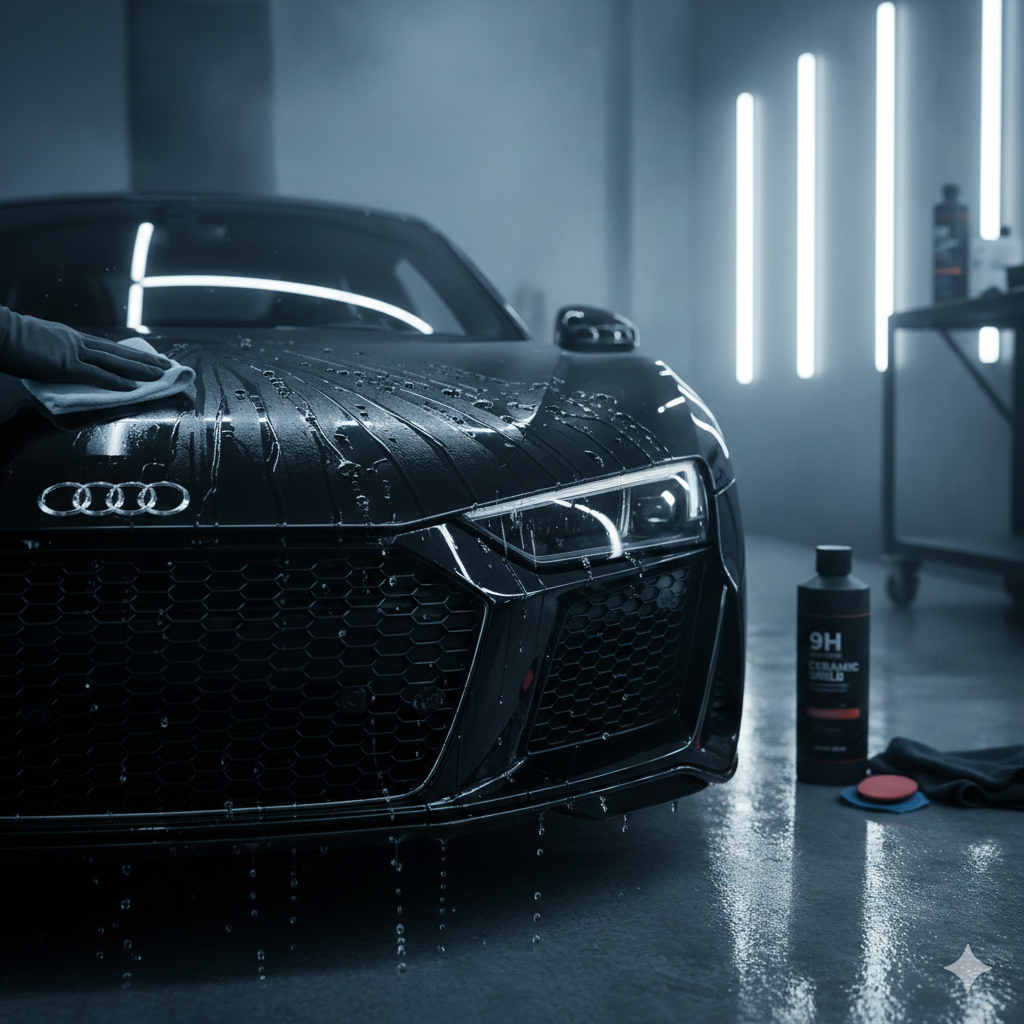
Is Ceramic Coating Worth It? The Ultimate Guide to Paint Protection
To understand why ceramic coating is a breakthrough in auto maintenance, we need to look at the molecular level. Standard car wax is made from organic carnauba palm leaves. Because it is organic, it begins to break down as soon as it comes into contact with heat and oxygen.
Coatings made of ceramic are inorganic. The majority are based on silicon carbide (SiC) or silicon dioxide (SiO2).
These substances go through a “cross-linking” process when they are applied to a surface while suspended in a solvent. This indicates that the molecules integrate into the clear coat’s surface structure rather than merely sitting on the paint. A permanent or semi-permanent bond that cannot be removed with soap or water is the end result.
The “Hardness” Factor: A 9H Rating Interpretation
Coatings with a 9H Hardness rating are frequently sold. To manage expectations, it’s critical to make clear what this truly means. Instead of using the Mohs scale for diamonds, this rating is based on the Pencil Hardness Test.
On a coating with a 9H rating, not even the best artist pencil can physically leave an indentation. In practical terms, this significantly boosts your paint’s resistance to:
- Micro-marring: The tiny scratches caused by drying your car with a towel that isn’t perfectly clean.
- Swirl marks: After a car wash, dark cars frequently have spiderweb-like patterns.
- Oxidation: The “cloudy” appearance paint acquires after years of exposure to the sun.
The Work Behind the Price: Why Experts Charge So Much
Many car owners are shocked by a $1,500 quote for a ceramic coating. However, the liquid in the bottle usually only accounts for 5% to 10% of that price. The rest is labour.
The Decontamination Phase
A professional begins by eliminating all signs of old wax, grease, and iron deposits. This comprises:
- Chemical Decontamination: Using “iron removers” that turn purple, metal particles embedded in the paint are dissolved.
- Using a clay bar, grit is physically removed from the paint’s pores during mechanical decontamination.
The Paint Correction Stage
This is the most crucial step. Because ceramic coatings are transparent and durable, they serve as magnifying glasses. Because the coating locks in any scratches in your paint, they will appear deeper and more noticeable.
Experts use a range of abrasive compounds and high-speed polishers for 10 to 40 hours to make the clear coat as smooth as a mirror. This is where the “Pro” look comes from—not the coating itself, but the preparation.
You don’t need a professional shop to get professional results. Our top-rated Ceramic Coating Starter Kit includes everything you need for under $100.
Strategic Advantages: Why Ceramic Coating Is “Worth It”
1. UV protection and oxidation prevention
The sun is the biggest danger to car paint. Because the chemical bonds in the paint are broken by UV rays, the paint turns chalky and dull. By reflecting these rays, ceramic coatings serve as a powerful sunscreen for your vehicle. It is particularly important for cars that are red, black, or bright blue because they are more likely to exhibit UV damage.
2. Resistance to Chemical Staining
Insects, bird droppings, and acid rain are examples of corrosive substances. If they are left on bare paint, they will “etch” into the surface and leave a permanent mark that needs to be sanded. SiO2’s inorganic nature makes it nearly impervious to these acids, giving you much more time to clean the vehicle before damage occurs.
3. Time and Water Efficiency
Because the surface is so hydrophobic, dirt has nothing to “grab” onto. During a wash, a simple pressure rinse can remove 80% of the surface dirt. This cuts your washing time in half and significantly reduces the amount of water and chemicals needed.
A Financial Reality Analysis of Long-Term Investments
To find out if ceramic coating is worthwhile, let’s compare it to traditional waxing over a five-year period.
Scenario A: Traditional Waxing
- Frequency: Every three months.
- Each professional wax or detail costs $100.
- $2,000 over five years.
- As a result, the paint is shielded but is still vulnerable to environmental etching and light scratches in between applications.
Scenario B: Professional Ceramic Coating
- Regularity: Every five years.
- $1,200 was the initial cost (paint correction included).
- $1,200 for a five-year period plus a few maintenance sprays.
- As a result of the immaculate paint, there is constant protection, increased gloss, and a much higher resale value.
The ceramic coating is often less expensive than maintaining a high-end wax finish over the car’s lifetime.
You don’t need a professional shop to get professional results. Our top-rated Ceramic Coating Starter Kit includes everything you need for under $100.
Finding the “Deal Breakers”: When It’s Not Worth It
Despite the benefits, ceramic coating is a poor choice for certain owners.
The Fan of “Tunnel Wash”
Avoid getting a ceramic coating if you would rather run your car through automated washes with rotating brushes. The dirt from the last fifty years has These brushes were filled. cars and will remove the coating’s hydrophobic qualities in a matter of months by scouring it.
The Temporary Owner
The cost of a professional coating is money you will never get back if you lease your car for 24 or 36 months and don’t care about the turn-in condition.
The Careless Owner
A “get out of washing free” card is not what a coating is. A coated car will “clog” if salt and mud are left on it for months. The water-beading effect will disappear, and the car will appear as lifeless as if it were uncoated.
Related Post:How Often to Change Spark Plugs: A Complete Guide for Every Driver
The Middle Ground in Do-It-Yourself Ceramic Coating
If a $1,500 professional job is out of reach, DIY kits are a viable alternative. Modern consumer coatings have been engineered to be “user-friendly,” meaning they have longer “flash times” (the time before the coating hardens) to prevent high spots.
The Do-It-Yourself Checklist:
You need a garage or a covered area because coatings cannot cure in direct sunlight or rain.It takes at least six to eight hours of focused time.
- You need a garage or a covered area (coatings cannot cure in direct sunlight or rain).
- At least six to eight hours of concentrated time are required.
- To make sure the paint is clean, you have to be prepared to do at least a “one-step” polish.
The Technical Evolution: The Current Significance of This
We must examine how automotive finishes have evolved over the past three decades in order to fully determine whether ceramic coating is worth your hard-earned money. In the past, “single-stage” paint—a thick coating of pigment that was fairly durable but lacked a deep sheen—was used to paint cars. Almost all cars nowadays have a base coat/clear coat system.
The gloss and colour protection are provided by the clear coat, which is a thin, transparent layer of resin. However, manufacturers are now compelled to switch to water-based clear coats due to contemporary environmental regulations. Despite being more environmentally friendly, these paints are frequently “softer” and more vulnerable to chemical etching and scratches than those from the 1980s. This is where ceramic coating comes into play as a cutting-edge remedy for a contemporary manufacturing reality.
The Ceramic Coating Ecosystem: Trim, Glass, and Wheels
The “worth” of the service rises dramatically when ceramic coating is applied to the entire exterior, despite the fact that most people only consider it as a product for the body panels.
1. Ceramic for Callipers and Wheels
Brake dust is a nightmare for anyone who drives a performance car with big brakes. In fact, this hot carbon dust may “bake” into your wheels’ finish, leaving them permanently pitted. Brake dust can be removed with a garden hose thanks to a special high-heat ceramic wheel coating, eliminating the need for harsh acid-based wheel cleaners.
2. Restoration of Plastic and Trim
The fading of black plastic trim is one of the most annoying aspects of owning a modern car. Dark trim eventually becomes a chalky grey due to UV exposure. In addition to providing protection, ceramic coatings made for plastic actually “lock in” the colour and darken the material, eliminating the need for greasy trim restorers that wash off in the first downpour.
3. Glass Coatings for Safety
The importance of safety cannot be emphasised, even though we previously talked about visibility in the rain. The “induction” of water on a coated windscreen is so great that it greatly improves visibility at highway speeds compared to using wipers alone. Additionally, it makes your morning commute much easier by preventing ice and frost from adhering firmly to the glass in the winter.
You don’t need a professional shop to get professional results. Our top-rated Ceramic Coating Starter Kit includes everything you need for under $100.
The Myth of Maintenance: “Self-Cleaning” Is False
A common term used in ceramic coating marketing is “self-cleaning.” You have to realise that being a “pro” owner is a relative term. A car with a coating is “self-cleaning” in the sense that loose dust that would have adhered to a waxed car could be washed away by a strong downpour.
Road film is still a problem, though. The greasy layer of oil, asphalt, and exhaust particles that builds up on your car’s bottom half is called road film. This cannot be completely repelled by any coating. That film will “mask” the coating if you don’t wash your car for months because you believe the coating will take care of it. When the water stops beading, you may believe that the coating has failed. Actually, all you need is a “decontamination wash” to remove the surface dirt and expose the coating beneath.
Choosing Between a Professional and an Enthusiast
Ask yourself these three questions if you’re still undecided:
- How long should I keep my cars? The protection pays for itself in terms of paint longevity if the response is five years or longer.
- How do I feel about giving my car a wash? If you find it tedious, the coating speeds it up by 50%. If you find the coating therapeutic, the results are improved by 50%.
- How much does “peace of mind” cost me? The coating is worthwhile just for the stress relief if you frequently worry about bird droppings or tree sap when you park beneath a tree.
Frequently Asked Questions (FAQ)
Can rock chips be prevented by ceramic coating?
Don’t. It is extremely thin (measured in microns) despite being hard. At highway speeds, it is not thick enough or elastic enough to absorb the impact of a stone. Paint Protection Film (PPF) is required for that.
Can I cover a wrap or decals with ceramic coating?
Yes, the majority of coatings are very effective on Clear Bra (PPF) and vinyl wraps. It makes cleaning the wrap much simpler and helps keep the vinyl from staining.
“High Spots”: What are they?
Inadequate levelling of the coating during application results in high spots. They resemble rainbows or dark, greasy smudges. These can typically only be removed by machine polishing after the coating has cured.
Is a ceramic coating superior to a sealant?
Indeed. In essence, polymer sealants are “synthetic waxes.” They endure for four to six months. Ceramic coatings, which provide a longer-lasting bond and significantly greater heat resistance, are a completely different technology.
How can I tell if the coating is failing?
The most obvious indication is a decline in “water behaviour.” The coating is either contaminated or has reached the end of its useful life if water starts to “sheet” (lay flat) on the hood instead of forming tight, round beads that roll off.
Can I coat my windscreen with ceramic?
Certain coatings are designed specifically for glass. Since water will fly off the windscreen at speeds over 30 mph, they are great for visibility in the rain and frequently eliminate the need for wipers.
Summary of Value
If you appreciate easy maintenance and long-term paint preservation, ceramic coating is worth the investment. It fills the gap between the costly, long-lasting protection of film and the transient protection of wax. It guarantees that your car will maintain its “new car” lustre for years by producing a permanent shield that is resistant to chemicals and UV rays, ultimately paying for itself through increased resale values and lower detailing expenses.
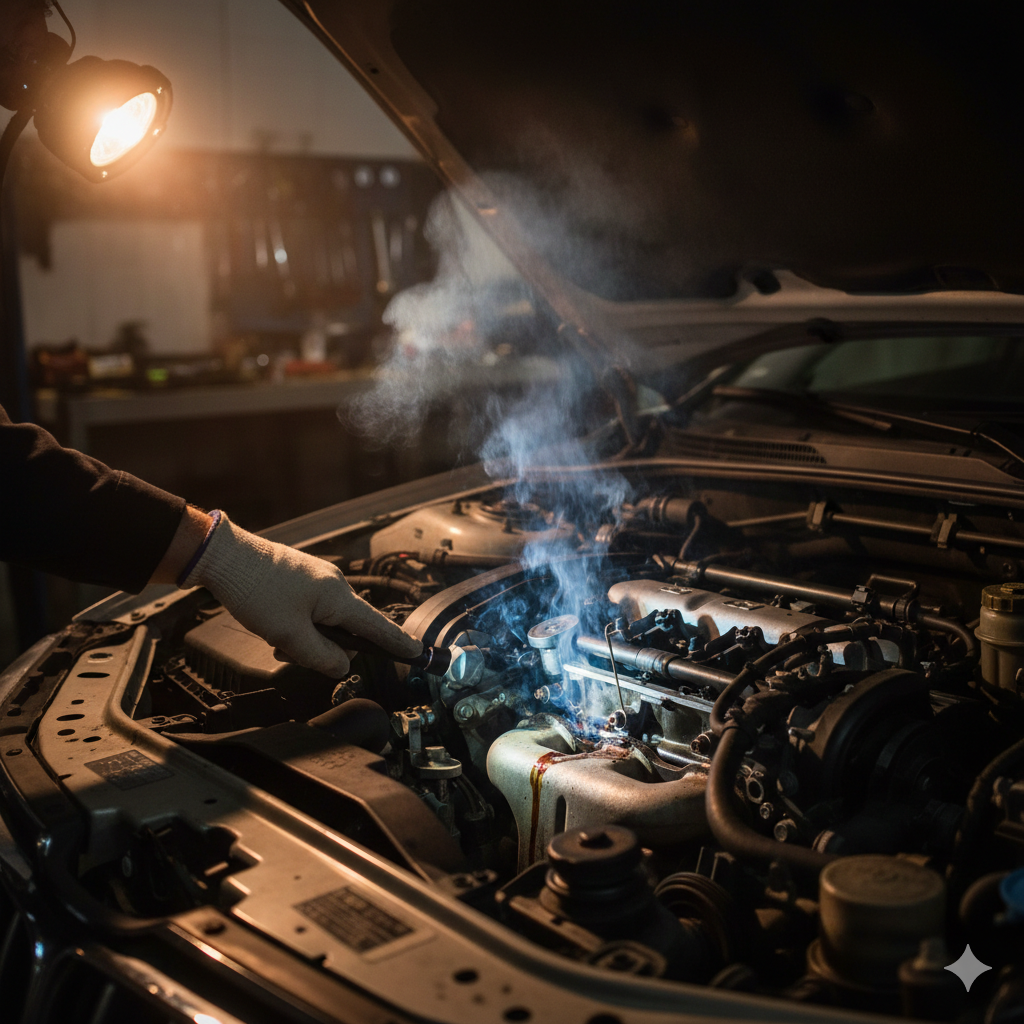
Burning Smell from car: Diagnosis and Safety: There is rarely a “wait and see” solution to a burning smell in your car. This is your car’s way of yelling that something is short-circuiting, leaking, or overheating. Ignoring these smells could result in a roadside fire or, worse, catastrophic engine failure.
I’ve combined real-world diagnostic patterns with technical mechanical data to help you locate the source of the stench and decide whether to pull over right away or limp to a mechanic.
What Does the Sensory Diagnostic Smell Like?
Use your nose before you pop the hood. When various materials burn, different chemical signatures are produced.
1. Rubber Belts and Hoses Burning
If the odour reminds you of a burnt tyre or a rubber, friction is most likely to blame.
- Slipping Serpentine Belt: Instead of turning a metal object, a belt that has come loose or a pulley that has seized (such as your alternator or AC compressor) slides over it. A rubbery stench and extreme heat are produced by this friction.
- Loose Hoses: A rubber coolant or vacuum hose will gradually melt and char if it comes into contact with a hot engine part, such as the exhaust manifold.
2. “Acrid” Scent of Burning Oil
Oil can be identified by its thick, heavy, and acrid smell, which is frequently accompanied by blue-ish smoke from the exhaust or hood.
- The most frequent reason is gasket leaks in the valve cover. Oil drips onto the heated exhaust manifold from the engine’s top.
- Blockage in the PCV valve: When the PCV system malfunctions, pressure builds up, pushing oil past seals and onto hot engine components.
3. Burning Carpet: Problems with the brakes
Your brakes are overheating if you smell burning carpet or upholstery after driving down a long, steep hill.
- Seized Calliper: When a brake calliper does not retract, the pads remain pressed against the rotor while you are driving. Extreme friction results from this.
- Handbrake Left On: The rear brake pads will “cook” if you drive with the emergency brake applied, even partially.
4. Rotten Eggs: Battery or Catalytic Converter
There is no mistaking the sulphurous odour.
- Catalytic Converter Failure: The converter cannot process exhaust fast enough if your engine is running too “rich” (with too much fuel). It overheats and gets plugged in.
- Overcharging Battery: The battery may overheat and release vapours of sulphuric acid if the voltage regulator malfunctions.
5. Sweet Syrup: Coolant Leaks
Although hot antifreeze isn’t “burning,” it does smell distinctly sweet, like maple syrup.
- Radiator Pinholes: Even a tiny leak can spray mist onto the engine block.
- Heater Core Problems: Your heater core most likely has a leak if you can smell it inside the cabin and your windows are fogging up.
The Sensory Diagnostic: What Does It Smell Like?
Before you pop the hood, use your nose. Different materials produce distinct chemical signatures when they burn.
1. Burning Rubber: Belts and Hoses
If the smell reminds you of a burnt tire or an eraser, the culprit is likely friction.
- Slipping Serpentine Belt: When a belt becomes loose or a pulley seizes (like your alternator or AC compressor), the belt slides over the metal rather than turning it. This friction generates intense heat and a rubbery stench.
- Loose Hoses: If a rubber vacuum or coolant hose touches a hot engine component (like the exhaust manifold), it will slowly melt and char.
2. Burning Oil: The “Acrid” Scent
A thick, heavy, acrid smell—often accompanied by blue-ish smoke from the exhaust or hood—points directly to oil.
- Valve Cover Gasket Leaks: This is the most common cause. Oil seeps out of the top of the engine and drips onto the hot exhaust manifold.
- Clogged PCV Valve: If the Positive Crankcase Ventilation system fails, pressure builds up, forcing oil past seals and onto hot engine parts.
3. Burning Carpet: Brake Trouble
Your brakes are overheating if you smell burning carpet or upholstery after driving down a long, steep hill.
- Seized Caliper: A brake caliper that fails to retract keeps the pads pressed against the rotor while you drive. This creates extreme friction.
- Handbrake Left On: The rear brake pads will “cook” if you drive with the emergency brake applied, even partially.
4. Rotten Eggs: Catalytic Converter or Battery
This sulfurous smell is unmistakable.
- Catalytic Converter Failure: If your engine is running too “rich” (too much fuel), the converter can’t process the exhaust quickly enough. It becomes plugged and overheats.
- Overcharging Battery: If the voltage regulator fails, the battery can boil over, releasing sulfuric acid vapors.
5. Sweet Syrup: Coolant Leaks
While not exactly “burning,” hot antifreeze has a distinctively sweet, maple syrup-like aroma.
- Radiator Pinholes: Even a small leak has the potential to mist the engine block.
- Problems with the Heater Core: Your heater core is probably leaking if you can smell it inside the cabin and your windows are fogging up.
Comprehensive Troubleshooting: A Comprehensive Guide
Check Your Fluid Levels
Wait for the engine to cool down. Check your oil dipstick and your coolant reservoir. A sudden drop in levels without a puddle on your driveway suggests the fluid is being consumed or burned off internally.
Look at the “Belt Path”
Check your belts for fraying or ‘glazing’ (shiny spots) when the engine is off. The belt is being ground down by friction if there is black dust surrounding the pulleys.
The Exhaust Visual Inspection
The search for discolouration or “hot spots” The metal pipes will have dark, charred stains if oil is spilling onto the exhaust.
When to Stop Immediately
Not every scent is the same. You have to stop and dial a tow truck if
- Smoke is visible, particularly if it originates from the wheel wells (brake failure) or beneath the dashboard (electrical fire).
- The Temperature Gauge Spikes: An overheating needle and a burning smell typically indicate a complete coolant loss. Your engine head will warp if you keep driving.
- The Oil Light Turns On: Your engine is just a few seconds away from “seizing” (turning into an extremely costly paperweight) if you can smell burning oil and the pressure light flickers.
Maintenance and Prevention
Adhere to a proactive maintenance schedule to guarantee your car stays dependable. According to experience, 80% of burning odours could have been avoided by:
- The majority of rubber gaskets in engines last between 80,000 and 100,000 miles before needing to be replaced.
- Brake servicing: To avoid “dragging” that results in burnt brake pads, clean and lubricate calliper pins at each brake pad replacement.
- Cooling System Flushes: It can erode your radiator from the inside out when old coolant becomes acidic.
How to Determine the Source with the Olfactory Map
Hundreds of different materials make up your car, including copper, rubber, plastic, aluminium, steel, and a variety of synthetic fluids. When it starts to fail, each has a distinct “flash point” and smell.
1. The Acrid Bite of Burning Oil
Burning oil is perhaps the most common scent reported by drivers. It is a thick, heavy, and “sharp” smell that often catches in the back of your throat.
- The Science of the Leak: Most oil smells aren’t caused by the oil burning inside the engine (which usually results in blue smoke from the tailpipe), but rather oil leaking onto the outside of the engine. The exhaust manifold can reach temperatures exceeding 500°F. When oil drips onto this surface, it vaporizes instantly.
- Common Culprits: The main suspicion is the valve cover gasket. Heat cycles and splits cause the rubber or cork gasket to become brittle over time. The odour will enter your cabin through the fresh air intakes if the leak is near the back of the engine and the oil hits the exhaust downpipe.
- A large leak can catch fire, but a tiny drop won’t. Additionally, internal engine friction brought on by little oil will result in a far more costly “metallic” burning odour.
2. The “Rotten Egg” Sulphur Stench
You are probably dealing with a byproduct of hydrogen sulphide if your car starts to smell like a chemistry lab gone wrong.
- The device that transforms poisonous gases into less toxic ones is called a catalytic converter. The converter is overloaded when the engine is “running rich”—that is, with too much gasoline and not enough air. Sulphur is released as the extra fuel burns inside the converter’s honeycomb structure, melting the interior precious metals.
- The Battery Factor: Sulphuric acid and water are combined in lead-acid batteries. Your alternator may “overcharge” the battery if the voltage regulator malfunctions. As a result, a sulphurous gas is released when the electrolyte solution boils. An overcharged battery may enlarge or even explode, so stop right away if you see this odour and a battery warning light.
3. Burning Rubber: Melting and friction
The smell of burning rubber is distinct—it’s the scent of a drag strip or a melting eraser.
- Your water pump, power steering pump, and alternator are all driven by the serpentine belt. The belt keeps flying over the stationary pulley at thousands of RPMs even if one of these accessories’ pulleys seizes up, or stops spinning. The rubber melts as a result of the tremendous friction heat produced.
- Radiator Hoses: If a cooling hose has come loose from its plastic clips, it may lean against the engine block. The hose’s exterior will gradually become charred by the heat. The engine will overheat and coolant will be abruptly lost if the hose melts through.
4. The “Burnt Carpet” Smell: Clutches and brakes
This smoky, gritty odour typically emerges after vigorous driving or hard braking in a car with a manual gearbox.
- Brake Drag: Even when your foot is off the pedal, the brake pads remain in contact with the rotor in the event that a brake calliper piston becomes stuck. Over 1,000°F of heat can be produced, effectively “cooking” the pads’ friction material.
- Clutch Slippage: The clutch disc in manual cars is composed of a substance that resembles brake pads. When the driver is “riding the clutch,” or the clutch is worn out, the disc slides against the flywheel. This produces a strong smell that can linger for hours, like burnt toast and carpet.
Deep-Dive Diagnostics: What to Look Inside
Safety comes first if you smell something burning. Park the vehicle, find a level area, and apply the emergency brake. When the engine is hot, never open the radiator cap.
Step 1: Visually examining “Blue Smoke.”
Check for traces of smoke by opening the hood.
- Top-level smoke: Most likely a gasket on the valve cover.
- A coolant leak or a failing AC compressor clutch are the most likely causes of smoke coming from the front (near the radiator).
- Smoke coming from the bottom: Most likely an oil pan gasket or gearbox fluid leak that is striking the exhaust pipe.
Step 2: “Hand Test” Close to Wheels
Place your hand close to—but not touching—each wheel as you carefully circle the vehicle. You may have a failing wheel bearing or a seized brake calliper if one wheel feels noticeably hotter than the others. Both need mechanical attention right away.
Step 3: Verifying the Integrity of the Fluid
Take out the oil dipstick. You have surpassed the thermal limits of your oil if it appears to be dark molasses or has a “burnt” smell. This indicates that internal parts of your engine are grinding together and that the oil is no longer adequately lubricating it.
External and Environmental Factors
Occasionally, the mechanical systems are not the source of the odour.
- A stray plastic grocery bag getting sucked under a car while driving is a very common occurrence, known as the “plastic bag trap.“ The bag melts instantly onto the exhaust pipe. It will produce a horrific burning plastic smell for several days until the residue eventually burns off.
- Rodent Nests: In order to stay warm during the winter, mice frequently scuttle inside engine bays. They bring in insulation, acorns, and dry leaves. This debris will smoulder if it is close to the manifold. Even worse, rodents frequently gnaw through the insulation of wires, causing electrical shorts.
Related Post:How do you know your Battery is Dead? How to Tell Fast
The Value of Expert Diagnosis
Although do-it-yourself troubleshooting can be useful, a burning smell frequently indicates “cascading failures.” For instance, a malfunctioning PCV valve could be the source of a burning oil odour. The pressure will simply blow the new gasket out again if you simply replace it without repairing the valve.
Smoke machines are used by certified technicians to locate vacuum leaks, and infrared thermometers are used to pinpoint the precise cylinder or brake component that is overheating. Because of this level of experience, you can avoid “parts cannon” engineering, which involves throwing money at random parts in the hopes that one of them will fix the smell.
Avoiding Future Mistakes and Fires
Avoiding burning smells altogether is the best way to deal with them.
- The 5,000-Mile Rule: A mechanic can identify “weeping” gaskets before they turn into “leaking” gaskets by performing an inspection every 5,000 miles, even if your oil’s manufacturer claims it lasts 10,000 miles.
- Engine Degrease: A clean engine operates more efficiently. Use an engine-safe degreaser to get rid of old oil residue so you can quickly detect any new leaks.
- Pay Attention to Your Belts: A burning belt begins as a screeching belt. Your belt is slipping if you hear a high-pitched chirp on chilly mornings. Before it melts, replace it.
FAQ
If my car smells like it’s burning, can I still drive? A: The smell determines it. You can drive a short distance while keeping an eye on the temperature gauge if the coolant smells sweet. Avoid driving if there is a strong odour of smoke or burning plastic. In less than three minutes, a car can be completely destroyed by an electrical fire.
Why does my car only smell like it’s burning when the heating is on? A: This typically indicates one of two things: either a blower motor failure or a leaking heater core (sweet fragrance). The electrical resistance rises as the motor’s bearings seize, heating the wires and giving them a burning plastic odour.
I smell burning after having my oil changed. Did they make a mistake? A: During the refill, a tiny bit of oil most likely leaked onto the exhaust manifold. This is typical. After driving for 20 to 30 minutes, it should go away. Check to see whether the drain plug or oil cap was left unfastened if it persists for more than a day.
What is the scent of a malfunctioning alternator? A malfunctioning alternator frequently emits an ozone or “hot electrical” odour. This occurs when the diodes malfunction or the internal copper coils overheat. Additionally, your headlights may flicker or make a whining sound that varies according to engine RPM.
Can a burning smell be caused by a dirty air filter? A: Not exactly. The engine may run “rich,” though, due to a severely clogged air filter, which ultimately results in the “rotten egg” odour of a failing catalytic converter.
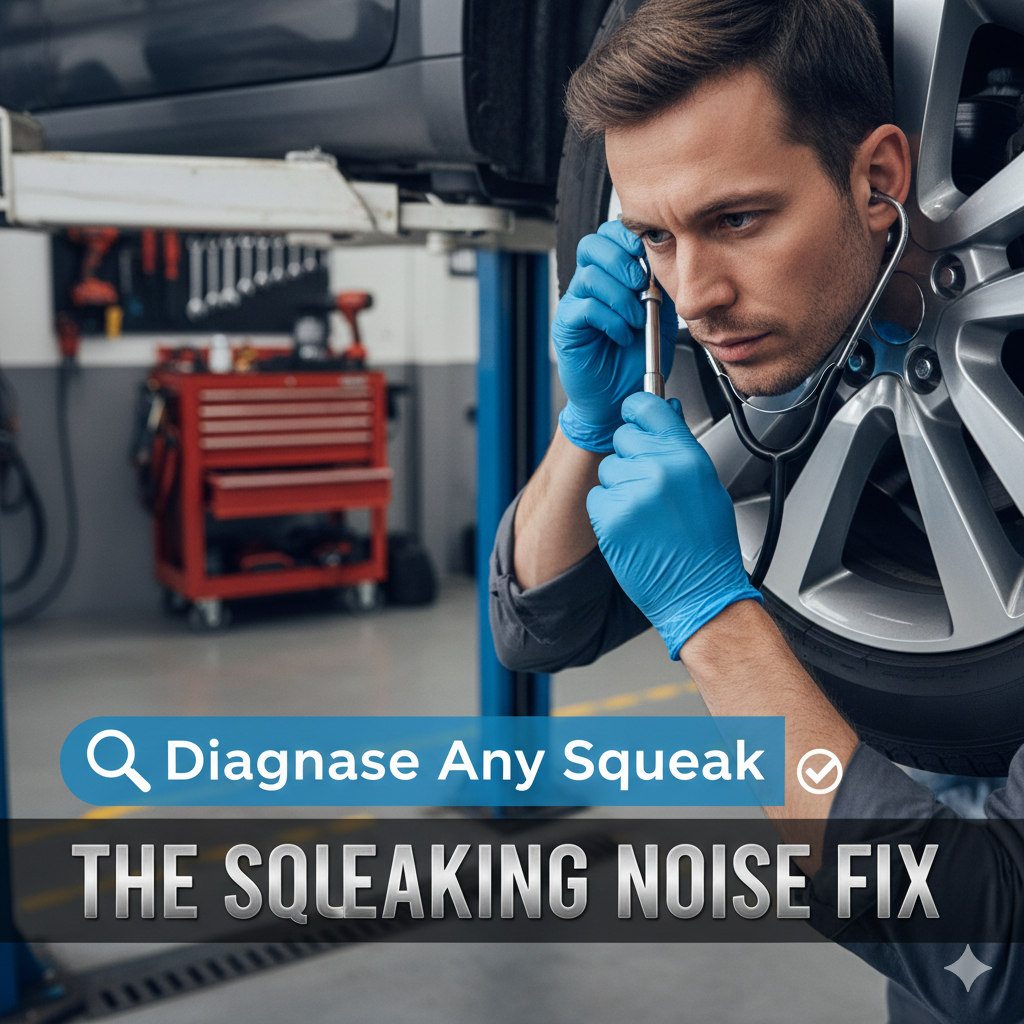
Squeaking noise while driving but not brakes applied: The typical driver’s first reaction when a car starts to squeak while driving is to check the brake pads. But when the squeak continues while cruising and is not impacted by the brake pedal, it’s a unique and frequently more annoying phenomenon. This suggests that a rotational or structural element elsewhere in the vehicle’s anatomy is the source of the friction rather than the friction material of the braking system.
We need to look beyond the wheels and into the realm of bearings, belts, bushings, and aerodynamics in order to find a workable solution.
Rotational Squeaks: The Constant Motion Physics
The “frequency” of a squeak that happens while driving typically corresponds to the vehicle’s speed. A rotational component is most likely the cause if the squeak gets louder as you accelerate.
1. The Hub Bearing Pre-Failure
Your wheels can spin with little resistance thanks to the wheel hub bearing. The steel ball bearings start to rub against the race when the internal grease degrades or water breaches the seals.
- A high-pitched, metallic chirping or squeaking that can intensify into a “growl” at faster speeds is the symptom.
- The Diagnostic: Jack up the vehicle safely and manually turn the wheel. The bearing is the cause if you hear a faint “scritch-scritch” sound or feel even a small vibration.
- The solution is that hub bearings are sealed components. Once they begin to squeak, there is no way to “grease” them. To keep the wheel from seizing or separating, the entire hub assembly needs to be replaced.
2. U-Joints and Driveshaft Harmonics
Universal Joints (U-Joints) are used by the driveshaft in vehicles with rear-wheel drive (RWD) and four-wheel drive (4WD) to transfer power. There are needle bearings in these joints.
- A rhythmic squeak that sounds like “chirp-chirp-chirp” at low speeds (typically less than 30 mph) is the symptom. It frequently sounds as though it is coming from right under the car’s centre.
- The solution is to try pumping heavy-duty lithium grease into the U-joint if it has a grease zerk. Squeaking U-joints, on the other hand, typically mean the needle bearings have already turned to dust. The only long-term solution for safety is replacement.
The Squeaks Under the Hood of the Serpentine System
There are instances when the engine bay is the source of the squeak rather than the wheels. It can be simple to mistake an accessory drive squeak for a wheel squeak because engine speed increases with vehicle speed.
1. The Glazed Belt
Rubber serpentine belts become “glazed” or shiny as they age and lose their elasticity. They slide across the pulleys as a result.
- During cold starts or when turning the steering wheel (which puts strain on the power steering pump), the symptom is a persistent, high-pitched squeal or squeak.
- The solution is to check the belt’s “ribs” for cracks. Replace the belt if it has more than 60,000 miles on it. “Belt dressing” sprays are short-term solutions that actually draw dirt and hasten wear, so avoid using them.
2. Tensioner Bearings and Idler Pulley
Although the pulleys the belt rides on have internal bearings, the belt itself may be in good condition. An idler pulley’s bearing will squeak uncontrollably if the dust seal fails.
- A localised squeak at the engine’s front is the symptom.
- The Solution: Turn each pulley by hand while the engine is off and the belt is taken off. A robust pulley should spin quietly and come to a rapid stop. The bearing is shot if it makes a “dry” metallic sound or spins freely like a fidget spinner.
Suspension Friction: Your Springs’ “Birdie”
The problem is probably “dry” suspension parts if the squeaking mostly occurs when you hit bumps or when the car’s weight shifts (during cornering).
1. Dry bushings (sway bars and control arms)
Rubber bushings are used in the majority of contemporary suspension parts to reduce noise. Over time, these rubber pieces dry out and rub against the metal arms they are meant to protect.
- The symptom is a “mouse-like” or “crunchy” squeak that occurs whenever the vehicle crosses a speed bump or a dip in the road.
- The Fix: One of the few places where a “liquid fix” is effective is here. For months, the noise can be reduced by misting the bushings with a silicone-based lubricant (never use petroleum-based oils or WD-40 on rubber, as they cause it to swell and rot).
2. Ball Joints and Tie Rod Ends
Your steering’s “pivot points” are these. They are covered with grease-filled rubber boots. Road salt and sand replace the grease that seeps out if the boot splits.
- The symptom is a squeak when the suspension goes up and down or when the steering wheel is turned. A “popping” sound is frequently heard after this.
- The Solution: This is a serious safety concern. Steering might be completely lost if a dry ball joint snaps. The joint needs to be replaced right away if it is squeaking.
Related Post: Portable Air Conditioner for Car
The “False Positive”: Why the Brakes Could Still Be the Cause
The braking system may be the cause of a squeak even if you are not using the brakes. For do-it-yourselfers, this is a frequent source of confusion.
1. “Screamer” (the wear indicator)
A wear indicator is a tiny metal tab that is incorporated into the design of brake pads. This tab only makes contact with the rotor when the brakes are not engaged when the pads are low. The pressure slightly alters the angle when you apply the brakes, and the noise usually stops.
- The Solution: This isn’t a bug; it’s a feature. It’s your car’s way of telling you to replace your pads right away to avoid damaging your rotors.
2. The Dust Shield
A thin metal plate known as a dust shield sits behind each brake rotor. Road debris or tire rotations can easily bend these. A continuous, high-pitched metallic squeal is produced if the shield comes into contact with the rotor.
- The solution is to carefully push the metal shield away from the rotor by reaching behind the wheel.
Aerodynamics and Trim Squeaks
The force of the wind can cause loose parts to vibrate against one another at highway speeds, producing a sound that sounds like a mechanical squeak.
- Loose Underbody Panels: The clips holding the plastic splash guards beneath the engine may come loose. They flutter against the frame at 60 mph due to the wind.
- Window Seals: A “chirp” that sounds like it’s coming from the suspension may be produced if a window seal is a little dry because the glass may vibrate against the rubber.
Step-by-Step Diagnostic Roadmap
Use this testing hierarchy to determine your unique squeaking noise solution:
- The Gear Test: Put the vehicle in neutral when you hear a squeak while driving. The wheels, tyres, or suspension are the cause of the squeak if it doesn’t change. The engine or gearbox may be the cause of the squeak if it changes or stops.
- The Steering Test: When you turn the wheel slightly to the left or right, does the squeak change? If so, it’s most likely a CV joint (on FWD cars) or a wheel bearing.
- The Temperature Test: Does it only squeak when the car is cold? This points to rubber components like belts or bushings that soften up as they get warm.
Constant Velocity (CV) Axle Friction
The CV axles in cars with front-wheel drive (FWD) and all-wheel drive (AWD) distribute power from the gearbox to the wheels while permitting steering and suspension motion.
1. The “Dry” CV Joint
A thick rubber boot and special molybdenum grease are used to protect the CV joint. Air and moisture enter the boot if a hairline crack forms, which is frequently too tiny to allow a discernible amount of grease to escape.
- The Symptom: When cruising, the joint will frequently make a high-pitched metallic squeak or “bird chirp” sound before it begins “clicking,” which is the traditional indication of failure. This noise is produced when metal bearings rub against one another without proper lubrication.
- The Diagnostic: Check the rubber boot “folds” by turning your wheels all the way to one side. The seal is compromised if even a thin layer of dark grease is visible.
2. Intermediate Shaft Bearings
An intermediary “jack shaft” is used in many cars to maintain the drive axles’ symmetry. A carrier bearing that is fastened to the engine block supports this shaft.
- The symptom is a persistent squeak that seems to originate from the dashboard’s center-passenger side.
- The Fix: General mechanics frequently ignore this bearing. For diagnostic purposes, the bearing race can be momentarily silenced with a shot of penetrating oil, but the only long-term solution to the squeaking noise is replacement.
The Engine and Transmission Mounts
Engine mounts are frequently the cause of rhythmic squeaking that happens while driving but stops when the vehicle is stationary, despite the fact that we frequently think of them as “thump” or “vibration” problems.
The Rubber-to-Metal Interface
Heavy-duty rubber is bonded to metal brackets to form engine mounts. Rubber hardens and shrinks with age.
- The Phenomenon: Because of variations in torque and uneven roads, the engine is continuously “rocking” back and forth while driving. As a result, the metal bracket grates against the hardened rubber.
- The Solution: Check for “fretting” (fine metal or rubber dust) on the mounts. If the rubber isn’t actually torn, the noise can be removed without replacing the entire mount by applying a thick silicone grease to the friction points.
Interior and HVAC Components (The “Phantom” Squeak)
Occasionally, the squeak you hear “while driving” is actually caused by vibrations in the road inside the cabin.
1. The motor blower’s bearing
Small bushings are used by the blower motor, the fan that forces air through your vents. These make a high-pitched squeal when they dry out.
- The Diagnostic: Turn off your HVAC system entirely if the squeak occurs while you’re driving. It was the fan, not the wheels or engine, if the noise stops.
- The Solution: Three or four screws can be used to easily replace the majority of blower motors, which are situated behind the glovebox.
2. Dashboard Rubbing
The plastic parts of your dashboard shrink in colder climates. These plastic panels grind against one another as the chassis flexes when travelling over uneven pavement.
The solution: To create a buffer between the troublesome panels, a professional “squeak and rattle” kit (which often contains tiny pieces of felt or foam tape) can be inserted.
Advanced Lubrication Theory: Selecting the Appropriate Repair
1. Why WD-40 Doesn’t Work
Standard WD-40 is not a long-term lubricant; rather, it is a solvent/degreaser. It will actually remove any leftover factory grease, which will make the squeak much louder even though it might stop it for ten minutes.
2. Silicone spray versus white lithium grease
- White lithium grease works best on metal-to-metal surfaces, such as latches, U-joints, and door hinges. It is “tacky” and does not wash off in the rain.
- Silicone Spray: Ideal for rubber-to-rubber or rubber-to-metal contact (window seals, bushings). The rubber does not swell or deteriorate as a result.
- Dry graphite: Ideal for ignition switches or lock cylinders where oil would draw dirt and result in “gumming.”
Aerodynamic Squeak-Mimicking “Whistling”
A loose piece of trim can vibrate at a frequency that sounds exactly like a mechanical squeak when travelling at speeds higher than 45 mph.
- Roof Rack Crossbars: If your roof rack’s rubber stripping is loose or missing, wind will blow over the empty channel and produce a high-frequency whistle or “chirp.”
- Side Mirror Glass: The wind will cause the mirror glass to vibrate against the plastic motor assembly if it is a little loose in its housing.
- The “Tape Test”: Cover each gap in the roof racks or trim with blue painter’s tape to detect an aerodynamic squeak. You have identified your culprit when the noise stops.
A Comprehensive Maintenance Schedule for a Noiseless Ride
Implement a “bi-annual lubrication service” to stop these problems from recurring:
- Lubricate the Boots: To avoid cracking, clean your CV and steering boots with silicone protectant after each oil change.
- Clean the Pulley Tracks: The idler and tensioner pulleys can be cleared of rubber accumulation by using a wire brush.
- Examine Heat Shields: Examine the thin aluminium shields that surround the exhaust. They will “chirp” against the exhaust pipe if they are loose.
- In rare instances, the tyre bead may squeak against the rim due to the sidewall’s increased “flex” caused by low tyre pressure.
FAQs
What is causing my car to creak more in the morning?
Usually, this is the result of “moisture-induced slip.” Rubber belts stiffen and pulleys or brake rotors develop a thin layer of oxidation (rust) overnight. When the engine warms up and the oxidation is removed by friction, the noise stops.
Is it possible for a malfunctioning alternator to produce a squeak when driving?
Indeed. When an alternator fails, its internal bearings may squeal. Because the increased electrical load puts additional physical strain on the alternator’s internal components, this noise frequently changes pitch when you turn on your headlights or rear defroster.
Is it true that my car no longer has “Grease Points”?
“Sealed-for-life” joints are found in the majority of cars made after the year 2000. Nonetheless, grease fittings (Zerks) are included with a lot of aftermarket replacement parts, such as tie rods or ball joints. You might actually need to manually grease these parts every 10,000 miles if your car has previously been repaired.
Can an exhaust leak produce a squeaky sound?
Quite unexpectedly, yes. As the exhaust pulses escape, a tiny pinhole leak in the gasket of the exhaust manifold may produce a high-pressure “chirping” sound. The engine RPM will be precisely mirrored by this sound.
Maintenance & Repairs
The Ultimate Guide to Car AC Refrigerant Leak Repair: Diagnosis, Tools, and Professional Fixes

Car AC Refrigerant Leak Repair: A slight hiss or, more likely, the subtle realisation that your “Arctic Blast” setting feels more like a lukewarm breeze is typically the first indication. The cabin is still a greenhouse even after you turn the dial. This is the quintessential sign of a refrigerant leak in the automotive industry.
Even though it might be tempting to simply pick up a “recharge kit” from the neighbourhood auto parts store and move on, doing so is frequently equivalent to applying a Band-Aid to a broken bone. Understanding the chemistry, the hardware, and the accuracy needed to keep the system operating for years rather than just days is necessary to properly fix an automobile air conditioning leak.
The Lifeblood Explained: What is Refrigerant?
We must dispel a widespread misconception before beginning any repairs: Your car does not “consume” refrigerant.
A closed loop is an air conditioning system. A physical hole or a failing seal somewhere in the system is the cause of a low level. The majority of contemporary cars use R-134a or the more recent and environmentally friendly R-1234yf. Heat is transferred from your cabin by these chemicals as they change from gas to liquid and back again. The compressor can no longer generate the pressure differential required for cooling when this gas escapes.
Phase 1: The Detective Work (Finding the Leak)
Finding a leak is notoriously challenging because refrigerant is odourless and invisible when it is in its gaseous state. To find the offender, however, experts employ four main techniques.
1. The “Oil Trace” Visual Inspection
A particular kind of compressor oil (PAG oil) is used to transport refrigerant. A small amount of this oil is frequently carried by gas that escapes. Check for “wet” or oily patches on metal lines, AC hoses and particularly where the connections are. If a layer of road dust has stuck to a particular greasy area on an air conditioner component, you’ve probably located the leak.
2. The electronic “sniffer.”
A sensitive portable gadget that “smells” the chemical signature of R-134a or R-1234yf is called an electronic leak detector. The probe is swept along the components and lines. It notifies you with a flashing light or an audible beep when it detects the refrigerant. This works very well for locating leaks in confined areas, such as the evaporator core.
3. UV dye injection
For both professionals and do-it-yourselfers, this is the gold standard. The system is injected with and circulated with a fluorescent dye. You examine the engine bay with yellow-tinted glasses and a UV light. There will be a bright neon green or yellow glow at the leak site.
- Pro Tip: Examine the condensation drain tube underneath the vehicle if you don’t see any leaks in the engine bay. Your evaporator core is glowing if the dye is there.
4. The Soap Bubble Test.
Traditional yet efficient. Use a solution of dish soap and water to mist the suspected fitting. The pressure is escaping in front of your eyes if it begins to blow bubbles.
Phase 2: Finding the Typical Suspects
In what location is the leak most likely to occur? A few typical failure points in a vehicle’s high-vibration environment are as follows:
- O-rings and rubber ring seals are present at every connection point. Over time, they dry out, flatten, and crack. It is the most common cause of “slow leaks.”
- The condenser, which functions as a miniature radiator, is situated directly behind your front grille. It is vulnerable to being punctured by rocks or road debris due to its location.
- Although AC hoses are composed of reinforced rubber, they may eventually wear through the outer sleeve due to friction from other engine parts.
- The Schrader Valves: Just like the valve on your tires, these service ports can develop leaks in their internal cores.
- The compressor shaft seal has failed if you notice a line of oil spraying on the hood’s underside just above the AC compressor.
Phase 3: The Step-by-Step Repair Process
Safety Alert: There is a lot of pressure on AC systems. If refrigerant gets in your eyes or on your skin, it can instantly cause frostbite. Wear gloves and safety goggles at all times. Moreover, purposeful refrigerant venting into the atmosphere is prohibited in many jurisdictions.
Phase 1: Recuperation
If there is still pressure in the system, the remaining refrigerant must be “recovered” using a professional recovery machine. You cannot simply open a line and let it spray out. If your system is already at zero pressure, you can skip to the teardown.
Step 2: Replacement of Components
You can swap out the malfunctioning component after the system is empty.
- Regarding O-rings: To avoid twisting the metal lines, use a spare wrench. Before installing, lubricate the new O-ring with a small amount of brand-new PAG oil.
- For the condenser, this typically entails taking off the radiator brackets or front bumper. To avoid further vibration damage, make sure the mounting bushings are in good condition.
- An essential step for the dryer or accumulator. The Receiver Drier or Accumulator needs to be replaced if the system has been exposed to the air for longer than a few minutes. This part includes moisture-absorbing desiccant bags. They lose their usefulness and are susceptible to internal corrosion once they are saturated by airborne humidity.
Step 3: The Evacuation Vacuum Phase
After the repair, you cannot just add gas. The system is currently full of air and moisture. Using a vacuum pump and a manifold gauge set, you must pull a vacuum (ideally to 30 inches of mercury).
- Run the pump for at least 30–45 minutes. This boils off any moisture inside the lines.
- After turning off the pump, give the system fifteen minutes. You still have a leak if your gauge’s needle shifts back towards zero. The system is sealed if it remains constant.
Step 4: Getting Back to Normal
Each car has a sticker under the hood that lists the “charge weight” (e.g., 600g or 1.5 lbs).
- Don’t Guess: Weigh the refrigerant in using a digital scale. Similar to undercharging, overcharging an AC system can cause excessive pressure that can destroy the compressor or blow seals.
- Only when the engine is running and the air conditioner is set to maximum can you add the refrigerant through the Low Side (blue) port.
Why “Stop Leak” Products Are Differing Opinions
At the store, you’ve seen cans that claim to “Seal Leaks Permanently.” Although they are effective at preventing microscopic seepage in rubber hoses, they are extremely dangerous. When these sealants come into contact with oxygen or moisture, they create a hard “scab.” Your entire AC system may be bricked if the sealant clogs the expansion valve or the small condenser passages due to moisture in the system. Because it can harm their pricey recovery equipment, the majority of professional shops will not service a car if they find a “stop leak” in the lines.
Why “Recharge Kits” Made at Home Are Frequently a Mistake
The “can in a box” that is present in the majority of auto parts stores must be addressed before we begin the repair. Typically, these kits come with a hose and a gauge. They can offer a short-term solution, but there are three main risks:
- Overcharging: Without a high-side gauge, you only see half the story. If you overfill the system, you risk “slugging” the compressor—trying to compress a liquid—which will instantly destroy it.
- Moisture Contamination: If your system leaked down to zero pressure, air and humidity have entered the lines. Moisture reacts with refrigerant and oil to create hydrochloric acid, which eats your aluminum components from the inside out.
- The “Stop Leak” Clog: Many DIY cans contain chemical sealants. These can gum up the expansion valve or orifice tube, turning a simple seal replacement into a $1,500 total system overhaul.
Step 1: Detailed Leak Detection Tactics
If you want to fix the leak, you have to find it. Here are the professional-grade methods for pinpointing even the smallest “seep.”
The UV Dye Methodology
The majority of contemporary cars are equipped with UV dye from the factory, but if yours isn’t, you can inject a tiny bit.
- The procedure is to use a UV torch in a dark garage after injecting the dye and running the air conditioner for 30 minutes (or driving for a day if the leak is slow).
- What to Check: Pay close attention to the compressor clutch. Your shaft seal is shot if you notice a “ring” of glowing green dye on the frame rails close to the compressor or on the underside of the hood. A new compressor is needed for this.
Nitrogen Pressure Testing
Professionals use dry nitrogen instead of wasting refrigerant to find a leak if the system is completely empty.
- Nitrogen is an inert gas that doesn’t hold moisture. By pressurizing the system to 150–200 PSI with nitrogen and watching the gauges, you can hear a large leak or use soapy water to find a small one without venting chemicals into the air.
Step 2: Dissecting the Elements
You need to know what you’re looking at in order to fix a leak. The main points of failure are as follows:
The “Rock Magnet”—the condenser
In front of the radiator is the condenser. It turns hot, high-pressure gas into a liquid by cooling it. It is susceptible to pebbles and road salt (corrosion) because it is located at the very front of the vehicle. The aluminium fins have a punctured core if you notice “wet” spots on them.
The Hidden Culprit: The Evaporator
Deep within your dashboard is this. It’s the area that genuinely cools down. Over time, it may rot due to the condensation that keeps it moist.
- Diagnosis Tip: Your evaporator is probably leaking if your car smells like “sweet chemicals” or “dirty socks” when you turn on the vents.
Schrader valves serving as service ports
Sometimes a $5 part is all it takes to fix the problem. Similar to a bike tyre valve, the valves where your gauges are connected may leak. Always use soapy water to check these; if they bubble, all you need is a new primary seal and a valve core tool.
Step 3: The Workflow for Professional Repair
Once the leak has been located, adhere to this strict procedure to guarantee that the repair will last ten years rather than ten days.
1. Recovery and Evacuation
To extract the remaining gas, use an AC recovery machine. In many places, this is mandated by law and safeguards the environment.
2. Dismantling Components
Always use two wrenches (a “back-up” wrench) when removing lines. Because of their softness, aluminium threads are very simple to strip. An inexpensive repair becomes an expensive one if you gall the threads on an AC line.
3. Replacement of seals
HNBR (Hydrogenated Nitrile Butadiene Rubber) O-rings should always be used. Usually, these are either purple or green. Standard black plumbing O-rings should never be used because they will dissolve in weeks due to the refrigerant and PAG oil.
- Assembly Lube: Before seating the new O-ring, coat it with the particular oil your system uses, which is typically PAG 46, 100, or 150. This keeps the seal from tearing or “nicking” while being installed.
4. Changing the Receiver Accumulator/Drier
Your air conditioning system’s “filter” is this. A desiccant (similar to the silica packets found in shoe boxes) is contained within. This section is now “saturated” with water if the system has been exposed to air.
- The Thumb Rule: The drier needs to be changed whenever a major part (such as the compressor, condenser, or evaporator) is replaced.
Related Post:Car Undertray Repair Cost
Step 4: The Most Crucial Step: The Deep Vacuum
After sealing the system, a vacuum pump is required. This accomplishes two goals:
- Leak Testing: A device cannot hold a charge if it cannot hold a hoover.
- Dehydration: Water’s boiling point is lowered to room temperature by applying a 29.9 inHg hoover. As a result, any moisture within the pipes evaporates and is drawn out by the pump.
- Pro Tip: In humid climates, run the vacuum for 1 hour. This is the only way to ensure the internal environment of your AC is bone-dry.
Step 5: Charge Measurement
These days, air conditioning systems are “critically charged.” This indicates that they are designed to operate with a precise refrigerant weight.
- The Sticker: Under the hood, look for the “SAE J639” sticker, which is either white or yellow. The text will read, “0.550kg +/- 0.05kg.”
- The Scale: A cheap do-it-yourself gauge cannot be charged by “feel” or pressure. Pressure is too strongly impacted by ambient temperature. To make sure the precise amount enters the system, weigh the canister using a digital refrigerant scale.
How to Maintain Your Air Conditioner to Avoid Future Leaks
Disuse is the leading cause of seal failure.
- Winter Operation: Most people don’t use their air conditioners during the winter months. On the other hand, the AC compressor is typically activated by your Defrost setting. This keeps the rubber O-rings lubricated and swollen by circulating the PAG oil. The seals will shrink and leak if they dry out.
- Maintain the Condenser Clean: Use a garden hose to periodically mist your front grille to remove dirt, insects, and salt that can corrode aluminium.
Frequently Asked Questions:
1. Is it possible to continue “topping off” my refrigerant rather than repairing the leak?
Although technically feasible, it is not advised for a number of reasons:
- Impact on the Environment: Intentional refrigerant venting, particularly of R-134a, increases greenhouse gas emissions. It is illegal in many places to add refrigerant to a system that is known to leak.
- System Damage: The PAG oil that lubricates the compressor leaks out along with the refrigerant. The compressor will eventually “grenade” internally if you run your system low on oil, sending metal fragments throughout your entire air conditioning system.
- Moisture Ingress: Leaks are reciprocal. Moisture from the air can enter when the system is off, forming acids that corrode the aluminium lines from the inside out.
2. How much does fixing an AC leak usually cost?
The location of the leak has a significant impact on the price:
- O-rings or Schrader Valves: $100 to $250 (mostly labour for recharging and evacuating).
- Lines or Hoses for AC: $200 to $500.
- Replacement of the condenser: $400 to $900.
- Core Evaporator: $1,000 to $2,500. Since the entire dashboard must typically be removed in order to access the HVAC case, this is the most costly repair.
3. Does the refrigerant in cars ever simply “wear out”?
Don’t. Unlike engine oil, refrigerant does not degrade or lose its potency over time. A leak, obstruction, or mechanical issue (such as a malfunctioning fan or compressor) could be the cause of your air conditioner’s decreased coldness. A system that is completely sealed can retain its charge for the duration of the car’s life.
4. Are “Stop Leak” cans from the auto parts store safe to use?
The majority of qualified technicians advise against applying sealants.
- The Danger: These substances are made to solidify when exposed to air or moisture. If there is any internal humidity in your system, the sealant may solidify inside the condenser’s tiny tubes or the expansion valve, completely blocking the system.
- “Refrigerant identifiers” are used by many shops prior to performing auto repairs. Because stop-leak chemicals can damage their $5,000 recovery machines, they might decline to service your car if they find them.
5. How can I detect a leak in my AC compressor?
On the underside of your hood, just above the compressor pulley, look for a “sling mark” of oil. One frequent place for failure is the front shaft seal. The compressor usually needs to be replaced if you notice a greasy, dirt-caked line in that spot, which indicates that the seal has failed.
6. What causes my air conditioner to run for a few minutes before blowing warm air?
Instead of being a straightforward leak, this is frequently an indication of moisture in the system. Moisture can freeze if the system was not adequately vacuumed during an earlier repair. at the expansion valve, using ice to physically seal the opening. The car briefly functions again until it refreezes after the ice melts (after being off for a while).
7. During a repair, how long should a vacuum pump run?
You should hoover a typical passenger car for at least half an hour to an hour and a half. This lowers the atmospheric pressure sufficiently that any liquid water inside the lines boils off into gas and is sucked out, not just to check for leaks. An hour or longer is safer if the car has been left with the system open for a long period of time.
8. What makes R-134a and R-1234yf different?
- R-134a: The standard for automobiles manufactured from 1994 to about 2014. It is effective but has a high global warming potential.
- The new “green” standard, R-1234yf, is present in practically all cars manufactured after 2017. In the atmosphere, it decomposes considerably more quickly.
- Note: These refrigerants cannot be switched. The service ports are different sizes, and the oils used (PAG vs. POE in some cases) are often incompatible.
9. Is it true that a rock hitting an air conditioner can cause a leak?
Yes. The AC condenser is located at the very front of your car, usually in front of the radiator. Because it is composed of thin aluminium to dissipate heat quickly, a small pebble kicked up by a truck on the highway can easily puncture one of the tiny “galleries,” resulting in a rapid loss of refrigerant.
10. Is there a leak in my air conditioner? It smells like chemicals or vinegar.
A leaking evaporator core is clearly indicated if you smell a strong, chemical smell, especially when the vents are running. The air box that supplies your cabin vents is directly leaking refrigerant. Inhaling compressor oil and concentrated refrigerant is unhealthy, so this needs to be fixed right away.
-
Maintenance & Repairs5 months ago
Car Undertray Repair Cost
-
Car Tips & Advice4 months ago
Is Automobile Insurance Tax Deductible?
-
Car Tips & Advice5 months ago
Tyre puncture Repair Cost
-

 Maintenance & Repairs4 months ago
Portable Air Conditioner for Car
-

 Car Tips & Advice4 months ago
Exhaust Pipe Repair Kit
-

 Maintenance & Repairs4 months ago
How much does it Cost to Paint a Car?
-

 Car Tips & Advice4 months ago
AC Compressor Replacement Cost
-

 Maintenance & Repairs4 months ago
How to repair a scratched car wheel